Catching Up

Hello there! I have been super quiet lately because work has been swallowing me, and then my mom came to visit us (yay!) so all my free time was spent with her. But I did manage to work on a few projects earlier this month, so I thought I’d share them here finally.

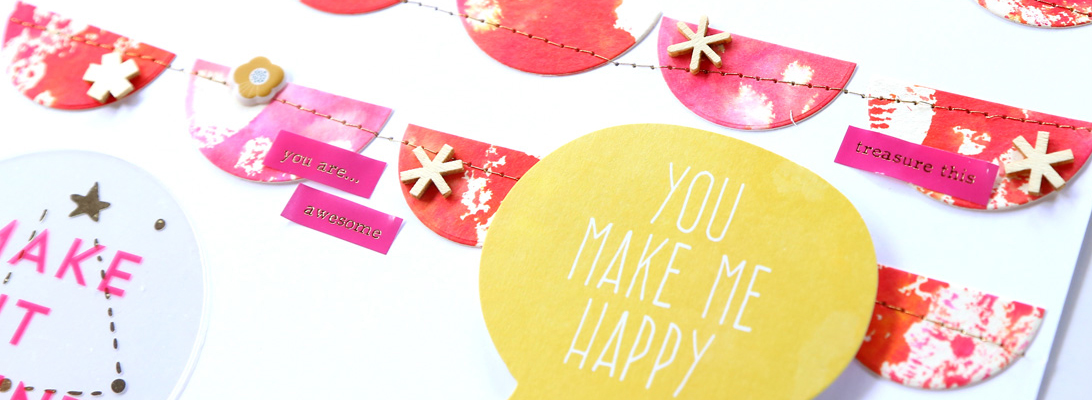
This was a fun page I made to document a few things I am loving right now. It’s made using the Confidant scrapbook kit from Studio Calico.

Here’s a look at a couple details:

I added some gold acrylic ink splatters. I love the shine and texture they add!

This next page is also made primarily with the Confidant scrapbook kit.

Finally, an all purple page. It’s a color I don’t use often, but I went all in on this page! 🙂

I have also been keeping up in my weekly traveler’s notebook documentation (in my Hobonichi weeks). Here are a couple recent spreads I made.

I hope to be back soon with some fun projects! Until then, have a great rest of May!

Weekend Pages

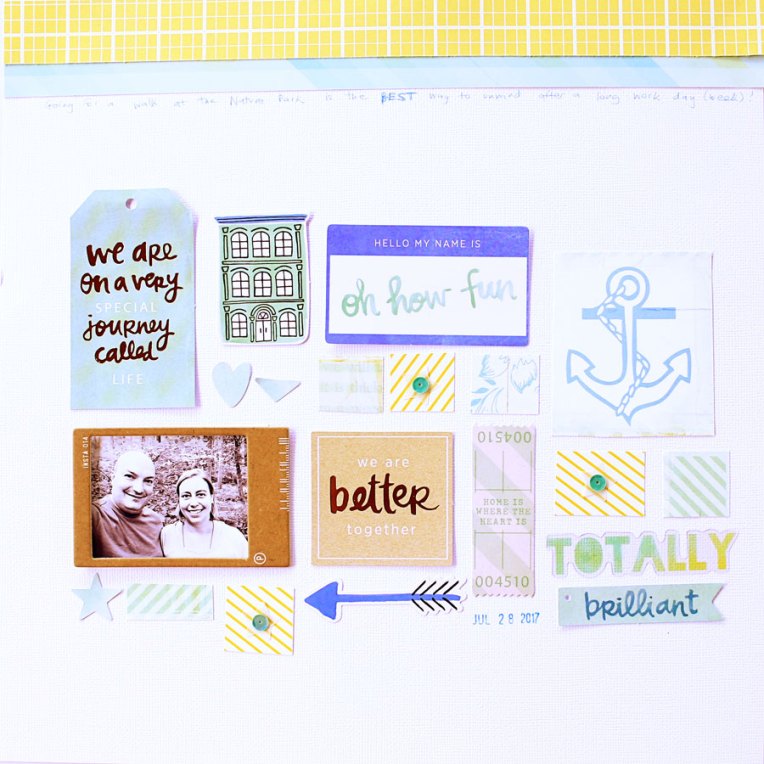
Hello! I had a rather productive weekend and, among other things, completed three 12″x12″ paper layouts. All of them use some old Studio Calico kits that I bought on sale. The first two are made with the Front Row scrapbook kit.

The hearts and black arrows are two sides of the same sheet of patterned paper – I had used a piece of it on this page a couple years ago, and now I used up what I had left.

I also used some die cuts from my stash.

The next page also uses the Front Row scrapbook kit, as well as a bunch of die cuts.

It was so fun to build this collage!

The green/blue/yellow color scheme is so refreshing.

For the last page, I had fun playing with my Distress Oxide inks! For this page, I dug out the Pool Party scrapbook kit from July 2016.

After the mega date stamp… there was the mega wine glass! 😀 Here’s a look at how this page came together.

The colors were inspired by the strips of patterned paper, so I chose some Distress Oxide ink colors to match, and stamped the title with them.

Next, I swiped the ink directly from the ink pad on a piece of clear plastic packaging, misted it with water, and transferred the color onto the alpha cards.

I love this easy and fun way to create a watercolor look with distress inks!

I hope you had a great weekend!

{this post contains affiliate links – if you make a purchase, you’ll support me at no additional cost to you}

Kill My Studio Calico Kit: June 2016- Film Club

Hello and welcome back for another month of Kill My Studio Calico Kit! This is the 14th installment of this series, and in total I have made a whopping (151) layouts. Yay me!

Kill my Studio Calico kit is a monthly series I started on my blog to hold myself accountable and use up my kits. You can subscribe to the Studio Calico Scrapbook kit here.

This month I’m using the Studio Calico scrapbook main kit for June 2016, Scout ($34.99 – but I got it when it went for sale for $10).

Notes: I really, really love the kit this month! I loved every single embellishment and found them easy to use,  I also loved the papers, especially the back sides not shown in this photo, except for a couple that were a bit too busy and harder to use. The stamp is great, I love the transparent pieces, chipboard stars, and the gold script words. I loved the specialty paper with the gold foiled constellations! Since I bought the kit on sale it didn’t include the large alpha, but I am never a fan of those.

Status: killed!
I made 11 layouts (6 12″x12″, 5 8.5″x11″), for a total of $10, or $0.91/page. I supplemented the kit with some items from my stash (stamps, ink sprays, and the odd embellishment). Here’s a roundup of all the pages I made:

And here is what I have left:

Leftovers: I have some scraps of paper left, some alpha stickers and chipboard stars, and washi tape. Pretty much killed!

And here is what I made with the kit.

I made a process video for this page, and you can see it here.

I had so much fun making the background for this page! I recently bought ten colors of the Dylusions ink sprays by Ranger, and they are awesome! They blend incredibly well when you add a bit of water, and I love the vivid colors! So as soon as I got them, I made this background to try them out.

I love how this page turned out – I made it to celebrate our 10th wedding anniversary.  I used ten puffy stars, one for each year of marriage, and a bunch of other stars for the years we have ahead. I backed the wood veneer star embellishment with card stock that I misted pink, so it stands out more.

I used the cooler tones of the pretty watercolored labels to add some interest to this page from our trip to Hawaii. I miss this place!! I also added some stamping but it’s hard to see that in the photo.

I love how the specialty paper pops against the kraft background! And yay me for using up some of those pink alpha stickers I’d bought in a sale and never used! 🙂

I had some more fun with the Dylusions ink sprays by Ranger. Also, I used Distress Oxide ink for stamping on the wood veneer and I love how well it worked – no feathering!

Here I added some tags I die cut from leftovers of the previous page – mopping up the excess Dylusions ink sprays by Ranger. And also some embossing on the background.

More leftovers of Dylusions ink sprays by Ranger – I LOVE how this page turned out!

Bunnies are pretty much my favorite thing ever. 🙂 I’m so happy this cutie is hanging out in our backyard this year! I was out of “n”s so I turned two “u”s upside down instead for the title.

This was my favorite paper in the kit and I really wanted to hoard it, but I ended up using it on this page and I’m so glad I did because I love it! And I did some more stamping on wood using  Distress Oxide ink.

On the other hand, this was my least favorite page of the kit, so I’m very proud of myself for using some of it! I cut it into strips and I like the look.

And that’s it! Another kit killed! Thanks for stopping by, and do leave me a comment if you like this series!

You can subscribe to the Studio Calico Scrapbook kit here.

Kill My Studio Calico Kit: April – Film Club

Hello and welcome back for another month of Kill My Studio Calico Kit! This is the 13th installment of this series, and in total I have made a whopping (140) layouts. Yay me!
This month I got the Studio Calico scrapbook main kit, Film Club ($34.99 – and only $5 with a promotion that started that month with the code SCKIT5).

Notes: I really love the colors this month, and the epoxy stickers. The rest of the embellishments were a bit hard to work with at first, but I made them all work in the end.

Kill my Studio Calico kit is a monthly series I started on my blog to hold myself accountable and use up my kits. You can subscribe to the Studio Calico Scrapbook kit here.

Status: killed!
I made 10 layouts (7 12″x12″, 2 8.5″x11″, 1 9″x12″), for a total of $5, or $0.5/page. I supplemented the kit with some embellishments from the Project Life kit, plus some items from my stash (stamps, paints, and the odd embellishment). Here’s a roundup of all the pages I made:

And here is what I have left:

Leftovers: I have some scraps of paper left, several chipboard letters (but I’m out of A’s and O’s, and I used the “1” flipped over to double as an “L” on a couple pages).

And here is what I made with the kit.

For the first page, I cut up the specialty floral paper with gold foil accents.

I love this one! I cut up some of the washi tape strips because I didn’t have a use for them, and I used the words to make up my title.

Here I used the rest of the floral paper.

This was so fun to make! I used my new oxide distress inks to make the watercolored background.

Again using my distress oxide inks for the stamping – this was my first time using them and I wanted to map out the colors. I added some puffy stickers and washi tape from my stash.

The floral paper and the embellishments are from my stash.

I knew I wanted to use the gold star sequins on the red cardstock. I also sprayed the cork “you’ve got style” gold, and added some navy enamel dots from my stash.

I wasn’t sure what to do with the yellow stickers from the kit, but here I paired them with some blue and pink chipboard embellishments, and mounted them on foam dots to give them dimension.

I love how this page turned out! This paper with the labels was my favorite in the kit, but I didn’t like the look of it full page, so I cut out a strip here and used it for my long journaling.

This is a 9″x12″ page for my travel album. I used up the rest of the ticket die cut numbers to mat my photo.

And that’s it! Thanks for stopping by, and do eave me a comment if you like this series!

You can subscribe to the Studio Calico Scrapbook kit here.


Beautiful Spring Day

Hello! It’s almost April so I thought it fitting that the next kit I chose for my Kill My Studio Calico Kit blog series is from April 2016, Film Club! 🙂

This page was inspired by the painted wood butterflies by Nancy Damiano; I only had 2 wood butterflies in my stash, so I added some feathers, and some paper butterflies (cut using a die from Papertrey Ink). I mostly used only items from the kit, and only added some puffy hearts and stars from Freckled Fawn (puffy stickers are my absolute fave!!), as well as some purple gems from an old Studio Calico kit (I think a card add on from Copper Mountain – Jan. 2014) to tie in the color of the flowers. I just love these colors, they feel so spring-y!

I never know how to use the washi strips,with the phrases printed on them, mostly because I am a literal scrapper and the phrases never quite fit what I am scrapping. Here I used one as is, because the words applied well (the flowers are fleeting, and also my mom’s visits are always too short). But then I cut up some words from the other strips to make my title (“beautiful” “spring” “day”) – I will do this again for sure!

I stamped two phrases from the stamp in the kit on the paper butterflies (I stamped on wood veneer in the past and the ink feathered a bit, and didn’t want to risk it on the wood butterflies – although it probably would be fine with pigment ink, which sits on top of the surface). I used washi tape to mask the wood veneers before painting them with acrylic paint – lime light and mint hint. Then I used the small dots in the kit stamp to add the polka dots on the feathers. I like how that touch of black matches the paper strips I used at the top and bottom of the page.
I love how it turned out! Now if the weather would just cooperate and get spring started! 🙂

Kill My Studio Calico Kit – Sep. 2016: Lost River

Hello and welcome back for another installment of my Kill My Studio Calico Kit series! I am not going in order…  this is the 11th kit I have killed, and in total I have made a whopping 130 layouts. Yay me!

Kill my Studio Calico kit is a monthly series I started on my blog to hold myself accountable and use up my kits. You can subscribe to the Studio Calico Scrapbook kit here.
I considered a kit killed when I don’t have enough paper to make another layout.

This month I killed the September 2016 Lost River scrapbook kit.

Notes:  I bought this kit with a $10 promotion (they also have a $5 promotion if you want to try a kit, check here and use the code SCKIT5), and I really like it. I found it to be a bit light on embellishments, but no big deal as I am trying to use up my stash more this year and was happy to add some items to supplement the kit. I also used some stamps from my stash. I didn’t care for the washi tape nor the stamp (in fact I have not used them).

Status: Killed! Knowing I had not paid full price for this kit resulted in me not pushing myself as much as I normally do to crank out 10+ pages from a kit. I used two of the cardstock pieces for other layouts but I didn’t count them towards killing this kit because all the rest was from my stash.
I made 8 layouts (6 12″x12″ and 2 8.5″x11″), for a total of $10, or $1.43/page.

Here’s a roundup of all the pages I made:

And here is what I have left:


Leftovers:  I ended up not using the yellow cardstock – I tried, but it was just too bright. I’ll use it on some other page in the future. But otherwise, this kit is thoroughly killed. I used a lot of the gold alphas, but I still have plenty left, and I have most of the vellum alpha. I didn’t touch the washi tape and stamp. I’m very happy I used up all the envelopes, and most of the tiny red sequins.

And here’s a look at all the projects I made:

While I normally start by using my least favorite paper, this time I started by using my favorite paper in the kit for this page – it was just perfect for this story! The stamp I used is from an old add on called Caramel Apple – I purchased it when it went for sale at last call last August for $10 (score!). The alpha stamp is from Freckled Fawn (discontinued), as are the cork trees (aren’t they pretty? I used up the whole pack – it may be my first time ever doing that! :)).


Most of the items on this page are from my stash – only the background paper and the gold alpha are from the kit.

I used some alpha stickers and embellishments from my stash.

This one is my favorite page this month. And I get bonus points for using up some flair from my stash! 🙂


I love how this one turned out. I used some stamps from my stash, as well as some heart stickers. The pretty owls are printables by Wilna Furstenberg.

On this page I used the kit almost exclusively: the only think I added from my stash is the enamel dots.

I had so much fun making this page! I used stamps from Sakuralala with Distress Oxide Ink (cracked pistachio), and then used some scraps of paper from the kit, along with a rubber banner and the vellum alpha.


I love how this page turned out! I used up my last paper scraps, and put to good use the red sequins and the rest of the kraft envelopes.

And that’s it for this month! If you have any questions, please leave a comment and let me know!
This was my most recent unkilled kit, so now I’ll have to dig up some more kits from 2016 that I haven’t used yet: I still have Film Club (April), Scout (June) and Pool Party (July) that are mostly untouched. I cannot wait!


You can subscribe to the Studio Calico Scrapbook kit here.

I purchased all products myself, but if you use the affiliate links in this post (at no extra cost to you!) you’ll help me buy more supplies and bring more content to this blog. Thanks for stopping by!

Kill My Studio Calico Kit – Jan. 2017: Roman Holiday

Welcome back for another installment of this Kill My Studio Calico Kit series: this is the 10th kit I have killed (I took a break after killing Homespun), and in total I have made a whopping 122 layouts. Yay me!

Kill my Studio Calico kit is a monthly series I started on my blog to hold myself accountable and use up my kits. You can subscribe to the Studio Calico Scrapbook kit here.
I considered a kit killed when I don’t have enough paper to make another layout.

This month I am using the Studio Calico scrapbook main kit, Roman Holiday.


Notes:  I really love the look of this kit! Pretty colors and fun embellishments. I was a bit unsure about the chipboard pencils (they had chipboard paintbrushes in the Film Club kit and those stumped me, because I tend to use elements in a literal way). The stamp is small and the sentiments aren’t all that useful to me, but I still managed to use it on several pages. The puffy hearts and puffy stickers are always a favorite of mine, and I like the touches of gold on the phrase stickers and die cuts. The floral paper is my favorite, along with the specialty paper.

Status: Not totally killed, but close!
I made 10 layouts (9 12″x12″ and 1 8.5″x11″), for a total of $39.99, or $4/page. I supplemented the kit with some embellishments from my stash, since after my January craft room reorganization I challenged myself to add a little bit of something old to every page I make. I also used some bits from the Roman Holiday Documenter kit. I also used and cardstock from my stash for a couple pages. Here’s a roundup of all the pages I made:

And here is what I have left:

Leftovers: the kit is rather killed. I could have kept going with this bits and pieces and probably made 2 more pages, but I wanted to wrap this kit up, and I am going to be hoarding that floral paper a bit longer. I love it so! I will use it up in bits and pieces here and there. 🙂

And here’s a look at all the projects I made:

This is the first project I made, and I stuck to a pink and gray color scheme, with gold accents. Usually  I am not a big fan of the washi strips, but I really like how this one looks on the pink background. I added some watercoloring on the “twenty seventeen” die cut. And the gold “cheers”, flair, sequins, pink hearts, rubber banner, gold label, star stickers and the tiny alpha stickers are all from my stash. The “anything is possible” stamp is from the same month’s Documenter kit, while the “You + Me” is from the scrapbook kit (I didn’t ink up the “= OUI” part since I have no use for that part of the sentiment).

Next up, one of my favorite pages of all times. It’s a two-page spread, in fact. I made it to recap what happened in 2016.

The left page was made to use up this lovely letterpress calendar. I thought about cutting it up to use the “it’s your year” part, but then I really liked the whole page, and the idea for this spread was born. The background paper (Maggie Holmes for Crate Paper) and alpha stickers (A Beautiful Mess) are from my stash.

The right hand side really makes me so happy. I started out with the pencils and the washi strips (the ones without the words are from the Roman Holiday Documenter kit). I spaced them out on the page, then calculated how many photos I’d need to fill up the space. It was so hard to narrow it down to only 16 photos!! That’s what I love more about this page – as I was putting it together, I looked through all my photos and thought back at all the good things that happened this year.
I used the puffy stickers from the kit to mark the months of the year corresponding to the photos, which I arranged chronologically. The only thing I added from my stash is the gold chipboard alpha and some sequins.

Totally switched up the color scheme for this page! 🙂 Once again, I used the pencils to create the design of this page, which is based on a grid. I pulled out some yellow stars, washi and sequins from my stash, as well as some cork asterisks and chipboard alpha.

Here I added some chipboard hearts, puffy stickers, flair and wood veneer from my stash, as well as a couple stamped phrases.

The leaves are from my stash, but they were just perfect for this page! I kept it simple and I love it just the way it is!

I just added a doily from my stash for this page.

The background cardstock is from my stash. I painted some watercolor circles in the color of the heart stickers from the kit.

On this page I documented a few favorite things from this month. I love the neon refill tape for my Dymo label maker! It doesn’t photograph well but it’s truly neon, so pretty!

Cardstock and chipboard embellishments from my stash. I wanted to use black cardstock for the background, but since I didn’t have any, I decided to paint some. I love the effect!

This was so fun to make!! Totally inspired by a template by Scrapping by Liz that I used in this digital page.

And that’s it for this month! If you have any questions, please leave a comment and let me know!

You can subscribe to the Studio Calico Scrapbook kit here.

I purchased all products myself, but if you use the affiliate links in this post (at no extra cost to you!) you’ll help me buy more supplies and bring more content to this blog. Thanks for stopping by!

Kill My Studio Calico Kit: March – Homespun

Hello and welcome back for another month of Kill My Studio Calico Kit! This is the 9th installment of this series, and in total I have made a whopping (112) layouts. Yay me!
This month I bought the Studio Calico scrapbook main kit, Homespun ($34.99). I also got the Asia stamp and die.

Notes:  I have to be honest. I did not like the look of the kit, and even in person it didn’t speak to me. Hence, it has been sitting there for the past 5 months. I think the problem was that the side A of the papers didn’t appeal to me, yet once I got myself to use it, I found that the side B was much more to my taste. Once I started using the kit, I got into the groove and, while it’s still probably my least favorite kit ever, I love the pages I made. Also, the silkscreen is really cool, I love it! And the alpha is awesome, there are so many letters!

Kill my Studio Calico kit is a monthly series I started on my blog to hold myself accountable and use up my kits. You can subscribe to the Studio Calico Scrapbook kit here.

Status: killed!
I made 9 layouts (1 12″x12″, 8 9″x12″), for a total of $34.99, or $3.89/page. I supplemented the kit with several embellishments from my stash, since I really need to put a dent in it. I also used some stamps and cardstock for a couple pages. Here’s a roundup of all the pages I made:

And here is what I have left:

Leftovers: the kit is most certainly killed. I have some seasonal items leftover (the wooden “March” and the March transparency, which I likely will use in next year’s Project Life album. I also  still have lots of letters left.

And here’s a roundup of all the projects I made:


And here they are, one by one.

I made this page as soon as I got the kit, and I love it! I only used the silkscreen+paint, alpha stickers, puffy stickers and stamp from the kit. The papers were from my stash, and the flowers are by Wilna Furstenberg. Anyway, I love love love how the page turned out. Alas, after this the kit just sat there, until this week. 🙂 What is really sad is that even though I made this page 5 months ago, I am in the exact same spot at the moment – sigh…
Anyway, the remaining pages were all made this week. I decided to make 9″x12″ layouts for my travel album, and I think this kit was a great fit for these photos. I also used several sketches from the Summer of Sketches class that is going on at Studio Calico (enrollment is closed). I don’t have a particular plan for the album because I already documented this trip in detail in last year’s Project Life album, but since it was the trip of a lifetime and I took hundreds of photos that I love, I have plenty of stories to document in this format.
At first I wasn’t sure how to use the rubber animals in the kit, but then I realized I had the perfect way to use the sheep for this title page in my travel album. 🙂 I also used the Asia craft die and the mega date stamp.
The quilt paper was my least favorite in the kit, but it grew on me a bit; here, I used it for the background and covered it up with the vellum, and also added some foam dots in between to make the background even fainter. I love the end result! Then I piled on the embellishments – all from my stash except for the rubber animals, which I thought worked great on this page about food. 🙂
I love the colors of this page! (the blue embellishments and the “adventure” stamp are from my stash). This wood paper was my favorite this month.
On this page I documented a few of my breakfasts on this trip. I created a grid using some patterned paper and the transparencies that are in the kit. The fabric patch and vellum alpha are from my stash. I also used embellishments from the Finch add on.


I used the silkscreen on a piece of the gray cardstock with two shades of green paint. This screen is very sticky so it tore off some of the cardstock, but I covered it up with the kraft sticker. I added a few embellishments from the Finch add on and from my stash.

I had fun making this page. I used the transparencies to ground my photos.

I love how this page turned out! I used a journaling card (which I punched out and cut up) and some stickers from the Pocket documenter add on.

And here is the last page I made to use up the last few scraps (background cardstock is from my stash). This page didn’t photograph very well, but I love how it turned out. I used some trim from my stash to match the colors in the photos. I used the silkscreen on vellum (which works well because it’s very slick so the screen doesn’t stick too much) with silver paint. Those transparencies from the kit went a long way, I loved using them!

And that’s it for this month! If you have any questions, please leave a comment and let me know!

You can subscribe to the Studio Calico Scrapbook kit here.

Kill My Studio Calico Kit: February – Savannah

Hello and welcome back for another month of Kill My Studio Calico Kit! This is the 8th installment of this series, and in total I have made a whopping (103) layouts. Yay me!
This month I got the Studio Calico scrapbook main kit, Savannah ($34.99 -but I bought it on sale for $17, stamp excluded).

Notes:  at first glance I didn’t love the kit papers as much as other ones, because of the softer colors; my favorite is the floral black and white paper that is on the back of the red gingham one. I love the puffy alpha stickers, the enamel dots, and the stickers.

Kill my Studio Calico kit is a monthly series I started on my blog to hold myself accountable and use up my kits. You can subscribe to the Studio Calico Scrapbook kit here.

Status: killed!
I made 9 layouts (3 12″x12″, 2 8.5″x11″) and a mini book, for a total of $17, or $1.7/page (counting the album as a single page). I supplemented the kit with some embellishments from the Project Life and Planner kits, plus some items from my stash (stamps, washi tape, white cardstock, and the odd embellishment). Here’s a roundup of all the pages I made:

And here is what I have left:


Leftovers: I am hoarding the last piece of the floral paper that I love. 🙂 I didn’t use the pink cardstock – I have a hard time with that color for a background.

And here is what I made with the kit. This month, I used a bit more stuff from my stash than I normally do. Here’s a roundup of all the projects I made:

And here they are, one by one.

On this page, in addition to the kit I used some of the new washi tape I just bought (see more below :)), and some puffy stickers from Crate Paper.

The sewing of the paper ended up being a bit wonky, but I went with it.

This page is to document my latest obsession: washi tapes! These are all tapes I purchased recently from Amazon, and I laid them out to see what they looked like (you can see them here). Since they looked so pretty all together, I decided to make a page about this obsession of mine. 🙂 Here are the links to the washi tapes I bought in case you are interested. 🙂 I also used some more of the puffy stickers by Crate Paper, along with some past stamps from the Project Life kits.

This one is probably my favorite photo ever of my mom and me, and I paired it with my favorite paper from this kit. I also used some embellishments from the Savannah Documenter kit here.

The sticker sheet included in the kit goes a long way! I used it to build a frame for my photo on this page.

I also made a mini book in traveler’s notebook format using the papers from this kit.
See more pages from this album, including a video walk through, here.

The houses are an old stamp (from the Daily Grind add on) – they were just perfect for these photos.

The washi tape is from the Savannah planner kit (love!), the stamps are from the Annette add on, and the embellishments are from the Finch add on.

This is my favorite page made with the Savannah kit. I chose a few snapshots representing a few things we did this month, turned them black&white, and paired them with my favorite paper of this kit. The “making” title came about because I was trying to spell out words with the leftover alpha letters, and this worked. 🙂 The heart stickers are from the Savannah Project Life kit, while the cork embellishments are from my stash.

And that’s it for this month. If you have any questions, please leave a comment and let me know!

You can subscribe to the Studio Calico Scrapbook kit here.

Kill My Studio Calico Kit: January – Arendal

Hello and welcome back for another month of Kill My Studio Calico Kit! I wasn’t expecting to have this post up so soon, but I was inspired by National Scrapbooking Day and made 7 pages with Arendal today, so this kit is now killed!

This is the 7th installment of this series, and in total I have made a whopping 93 layouts. Yay me!
This month I got the Studio Calico scrapbook main kit, Arendal ($34.99, but I bought it at the kit sale they had in March for $17.00), as well as the Canal Street embellishment kit ($7 at the kit sale).

Notes: I really love the colors this month – pink and lavender and yellow. I love the puffy stickers and the frames in the main kit, and the puffy stickers in Canal Street.

Kill my Studio Calico kit is a monthly series I started on my blog to hold myself accountable and use up my kits. You can subscribe to the Studio Calico Scrapbook kit here.

Status: killed!
I made 9 layouts (4 12″x12″, 5 8.5″x11″), for a total of $27, or $3.38/page. I supplemented the kit with some items from my stash (stamps, paints, cardstock and the odd embellishment).

And here is a look at what I made with the kit.


This was a fun page tom make! I used silkscreens and paint to add texture to the page.

I love how this page turned out!

I piled several die cuts, paper strips and frames on top of the busy background.

This is one of my favorite pages this month! I loved this photo so I kept it big for this page.

I toned down the card stock background a bit using gesso.

The strip of the paper with the numbers is from my least favorite paper from the kit this month, I couldn’t bring myself to use more but I love the look of this strip on this page.

I used the mega date stamp on this page (it’s getting restocked next month if you’re interested!).

The lavender card stock was from my stash. I used the big letters from Canal Street as a mask and added mist on top (white and blue).  It turned out just as I’d hoped! The journal card is from the Documenter kit, and the cork snowflakes are from my stash.
And here is the last page, made the day after NSD.

My last page features a lot of hand stitching. The design was inspired by that awesome card from the Documenter kit that I was hoarding. I wish the black + gold would photograph better! Anyway I am thrilled with how this page turned out! The gold alpha and star embellishments are from my stash. I embossed the large number from Canal Street with grapefruit Zing embossing powder.

And what wraps up this month! I hope you are enjoying this series. All items were purchased by me and if you use the affiliate inks in this post I will happily receive a small commission, at no additional cost to you. Thanks to those who left comments on my Kill My Studio Calico Kit blog series – I will keep going!

You can subscribe to the Studio Calico Scrapbook kit here.