Project Life – Week 45

This was election week. I went with a red (mostly) and blue theme. 🙂

Project Life - Week 45

I added an insert because I had several instagram photos this week and I wanted to include them all. I have the hardest time leaving out pictures, because they usually tell different stories, they aren’t just the same shot in many copies, and using inserts is ideal for me.

Project Life - Week 45
Here’s what the spread looks like once you turn the insert.
Project Life - Week 45
On the left page I went with two full pocket pages with some added journaling.
Project Life - Week 45
I used the Design C photo pockets for the right page. And here are some detailed shots.
Project Life - Week 45
I used the 6×6 paper pad from the Basic Grey Fact&Fiction line from JoAnn’s – I love this line! The alpha stickers are by October Afternoon. I love little alpha stickers, they are just perfect to title my Project Life pages!
Project Life - Week 45
Two instagram photos and a screenshot from my Dancing with the Stars votes.
Project Life - Week 45
I used the Studio Calico Stepping Stone alpha inked with Colorbox pigment ink to title this card, and took a screenshot of the election results from a news website.
Project Life - Week 45
I took a picture of the die cuts in the Fact & Fiction line. So cute!! I cut out the “happy” with my Silhouette, and colored it with a marker.
Project Life - Week 45
I used a little tag by Elle’s Studio and a piece of a grid card to add journaling to this photo.
Project Life - Week 45
I had plenty of space on this photo, so I journaled straight onto it with an American Crafts pen.
Project Life - Week 45
The 4″x4″ of the Design I insert are perfect for an instagram photo + some journaling. 🙂 Instagram has certainly changed the way I document my everyday!
Project Life - Week 45
I cut out the red and white pinked circle with the Silhouette.
Project Life - Week 45
The red heart was cut out of vellum with my Silhouette, and I colored it with a red marker.
Project Life - Week 45
This wasn’t an instagram photo, but I cropped it square anyway. 😉

Project Life - Week 45
I rarely use black&white pictures, but I do love the look – I just have to remind myself to try it out more often!
Project Life - Week 45
I wore a pretty outfit to a concert but DH didn’t want to take a picture of me, so I took this shoeless self shot to at least have something to remember it by.
Project Life - Week 45
And this is all for Week 46! 🙂 My mom has been here for the past 10 days, so I’m a bit behind: Week 47 is halfway done, and as soon as my mom leaves 🙁 I will get back to working on it. And December is starting soon – I can’t wait to put some Christmas goodies to use in my album! 😉

Document Your December and Black Friday at The Lilypad

Yesterday was Black Friday in the U.S., the day for crazy sales and holiday shopping. Last year (for the first time) we braved the crowds and went shopping at ~6am, but this year I decided not to. We’re too busy, and didn’t really have much to buy. Instead, I did some very rewarding online shopping, followed by a quick dash to the mall at 10 AM – we visited 3 stores and didn’t have to fight the crowds. 😉 But hands down, online shopping rocks. And the sale that is going on at The Lilypad on all Christmas and winter products is perfect to gear up for December Daily!

I successfully completed a December Daily album in the past two years, so I know what works and what doesn’t work for me. This year I decided to combine the December Daily album with Project Life (I wouldn’t have enough material and motivation to keep up with two albums at the same time!), so I’ll be using the Project Life concept (document the little things, use photo pocket pages) but in a mini album format. I am using an 8.5″x5.5″ binder by Martha Stewart from Staples. I chose this size because it’s perfect for hybrid, and I’m all for saving paper when I print. 🙂 In 2010 I made all my foundation pages of the album ahead of time, because I was traveling in December. In 2011 I didn’t, because I was home and wanted to have the freedom to choose the design based on the photos I had for each day. This year, I will also go with the freedom approach :), but since the holiday products that have already been put in the store are so tempting, I have done a few pockets already. 🙂 Here’s what I used.

Last year I started the tradition of our Elf on the Shelf, and I am excited to bring him out again this year. The tree went up yesterday, so I have a feeling he’ll make an apparition soon. 😉 Here are a few other goodies I’ve used so far.

It’s no mystery that I love deer and reindeer (and glitter too! LOL), so these cards by Paislee Press had to go straight in my album. 🙂 Here’s a peek at the pockets I’ve made so far.

DD 2012

DD 2012 - elf peek

DD 2012

DD 2012

DD 2012

DD 2012

Credits:
A Christmas Tradition by Jenn Barrette and Valorie Wibbens
Peace and Love word arts by Little Butterfly Wings
Pocket Stuffers no. 2 by Valorie Wibbens
Press cards no. 18 by Paislee Press
Reindeer paper from Kitschy Christmas by Jenn Barrette and Sahlin Studio

I will be rearranging my pockets around once I start actually working on the album, but I think I’m off to a great start! 🙂

Project Life – Week 44

Still catching up on posting the latest weeks up on the blog. This is the week when I started being current again: Week 44. 🙂 It was Halloween week.

Project Life - Week 44

I started with some digital journaling cards by Digital Design Essentials and then just added some of the grid journaling cards, both in 3×4 and 4 x 6 size. I cut down the 4×6 to 4×4 to fit in the pockets on the right side. The photo pocket pages I used are Design F and the 3×3 design by We R Memory Keepers.

Project Life - Week 44

My color scheme was orange, black and pink. Nice for Halloween! I used some cuts that I made with my Silhouette digital cutter.

Project Life - Week 44

Here are the detailed shots.

Project Life - Week 44

I think this title card was perfect for Halloween week. 😉 Spooky but not scary. 🙂 The “beware” card went very well with the journaling, since we had a rough day indeed that day! The title was cut from a paper from the Crate Paper Snow Day collection. I bought it a couple of years ago and it is much thicker than the papers they sell today! It gave me some trouble cutting in the Silhouette. 🙂

Project Life - Week 44

Each year I put together a calendar for our families (I’ve been doing this since 2009!) and have them printed by Artscow because you just cannot beat the value. So in September/October I’m usually cranking out all the calendar toppers to place my order before Christmas gets too close. 🙂 I got my calendars and they turned out just great! I added piece of the shipping slip on the journaling card, along with a stamp by Ali Edwards stamped with Ranger Tim Holtz Spiced Marmalade Distress Ink Pad.

Project Life - Week 44

Here I used a handy stamp alpha by EK Success.

Project Life - Week 44

Lots of instagram shots are finding their way into my album! 🙂

Project Life - Week 44

Stepping Stone alpha stamp (numbers) by Studio Calico/Hero Arts.

Project Life - Week 44

I bought my mom’s Christmas present! I added the sticker that came with it on my card, along with a picture from the website, and I used a snowflake stamp as a border to go with the Christmas theme. 🙂

Project Life - Week 44

I’ve been adding more full size pictures in my Project Life album, and I love it!

Project Life - Week 44

I love cutting vellum in my Silhouette!

Project Life - Week 44

I love these 4″x4″ slots – perfect to fit instagram photos!

Project Life - Week 44

After cutting this pretty snowflake out of vellum, I needed to make it stand out, so I sprayed a journaling card (cut down to 4×4) with brown mist.

Project Life - Week 44

Here I combined some letters cut with the Silhouette and Studio Calico alpha stamps.

Project Life - Week 44

And that’s it for Week 44! 😉

Project Life – Week 43

This was a fun week to put together. I mainly used 3×4 and 4 x 6 Grid Cards, with some memorabilia from the week added in. All the little embellishments and stickers I used are from the fabulous Fact & Fiction line by Basic Grey.

Project Life - Week 43

I had several pictures this week (we went to the pumpkin patch, as you can see ;)) so I made an insert using the Design H pockets (I recommend the small variety pack to have a few different insert designs on hand). Here’s what the album looks like with the insert page turned.

Project Life - Week 43

And here’s a closer look at the front and back of the insert.

Project Life - Week 43

For the left page I used a Design C Photo Pocket page.

Project Life - Week 43

And for the right page I used a Design F Photo Pocket page. Lots of orange in the photos this week, but I love how the blue of the sky pops out! 🙂

Project Life - Week 43

In Instead of having a full pocket dedicated to the title, I just added the title to a large photo.

Project Life - Week 43

We have apple trees in the backyard, and deer love apples. 🙂 This adorable deer jumped right in our backyard and it was so funny to watch it eat the apples! Can you see it in his mouth? 🙂 He gobbled it up in one piece! 🙂 Too cute.

Project Life - Week 43

This fabulous “hello there” tag is from packaging of an order from Paper Coterie (see a few cards below) – I thought it was perfect to go with the picture of the deer! I loved the colors too, so I matched the red and blue in the rest of the spread.

Project Life - Week 43

I bought this stamp just because of the adorable deer, and it was perfect for this card! 🙂

Project Life - Week 43

DH and I are big Dancing with the Stars fans, and we vote for out favorites. I always make sure we take screenshots of out votes to that I can include them in my album. I think it will be fun to look back at these, but who knows? Maybe we won’t even remember who these people are.. 🙂

Project Life - Week 43

I’ve been holding onto this card by Marcy Penner (Hello Forever) for a while.. I got it in a class kit from Studio Calico, and I used it here because the blue matched my color scheme. I love the look!

Project Life - Week 43

Here’s my order from Paper Coterie. Again I added part of the packaging – it was so well designed that I wanted to keep it. That’s why I love Project Life so much!

Project Life - Week 43

I split this picture into two pockets, along with the heading. The date stamp is the smash one.

Project Life - Week 43

I added a label done with my DYMO. And that’s it for Week 43! 🙂
Project Life – A Change in Attitude

Project Life 2012 
{my first album for 2012. I switched to a second album starting with Week 25. :)}

On Catching Up..
I have recently changed the way I approach my Project Life album, and I’m excited to be sharing more recent pages soon! Before the summer I fell back with my PL, and even though I heard advice from several people who had been able to catch up by working on the current week and then working backwards, I stubbornly refused to work current, and kept working chronologically. Since I use different type of protectors, I didn’t want to be locking in the design of the previous week by working on the later one. (how stupid is that?? 😉 But I kept at it for months!)
The problem is that once you’re behind, you don’t really have a strong motivation not to fall even more behind. You’re already behind, so what’s another week going to do? The result is that I let an entire month go by without completing a weekly spread! So a few weeks ago I decided to give this new approach a try: work on the latest week, and work on the older ones at the same time. It has been going well so far: I started with Week 44, then caught up with Week 43, and completed Week 45 on time. I haven’t finished week 46 (last week) yet because I was away on a business trip, and I’ve been super busy since I got back, but I have about half the pictures printed out already.
My mom is arriving later today for a 2 week visit, so I will likely fall behind again, but I want to keep up this method because I know it will help me get caught up faster.

Style Change
One thing I noticed when I compared the albums of scrapbookers I admire with mine is that I have so many photos in mine that I often have to make collages to fit all the pictures. Collages are great, but I love having bigger pictures in my album. So I’ve been moving towards larger pictures, even if it means I need to add an insert. I’ve added an insert for the past couple of weeks, and even though it will make my album bulkier in the end, it makes me happy.

What Next?
11 months in, I’m still excited about this project, and I cherish my album dearly.
I will keep doing PL in 2013 as well. I have too much fun stamping in my album to give it up, but I have simplified my style (I don’t try to color match as hard as I used to) and I make extensive use of the 3×4 and 4 x 6 Grid Cards. Another common theme I noticed in the pages I admire is that all of them have a white border around pictures, so I think I will start trying that look in 2013.
Photographing and blogging my pages is a huge time commitment, but it’s a good motivator too, so I plan to keep doing that as much as possible.

What’s your approach with Project Life?

Project Life – Week 25

Well, it certainly has been a while since I shared Project Life pages here! Let me pick up from where I stopped, Week 25. This was back in June. It was a quiet week, filled with little everyday things. DH was gone for part of the week.

Project Life - Week 25

I had a few pictures I wanted to include, so I used some of the photo collage templates by Designs by Lili – they come very handy for Project Life! I used photo pocket pages Design A and Design C.

Project Life - Week 25

I used a variety of pretty stamps this week, along with some tags from Elle’s Studio.

Project Life - Week 25

Here are the detailed shots.

Project Life - Week 25

For the title I used an alpha by Basic Grey, a tag and a stamp by Elle’s Studio. I used VersaFine toffee ink, which has a warm, lovely mustard color. I used the usual Smash date stamp.

Project Life - Week 25

I used some digital word art by Jenn Barrette to complement the silly pictures we took at Red Robin. While I was taking a picture of DH, I noticed that the Red Robin statue looked as if it were perched on DH’s shoulder, so I made him pose for a couple of fun shots. 🙂

Project Life - Week 25

The journaling card on the left is by Valorie Wibbens, while the stamp I used on the right is by Ali Edwards for Technique Tuesday – one of my favorite sets ever!

Project Life - Week 25

I love all the stamps by Amy Tangerine, and the latest one, Ready Set Go, is no exception! I used it to depict the fact that DH drove back home, and the fork+knife will come handy for all my food pictures. 🙂 The Technique Tuesday Days of the Week stamp by Ali Edwards is a must have for Project Life!

Project Life - Week 25

It’s no secret that I love bunnies. 🙂 I love this October Afternoon Woodland Park stamp!

Project Life - Week 25

Another great stamp set by Ali Edwards for Technique Tuesday in this card and the following.

Project Life - Week 25

I also used an exclusive alpha stamp by Studio Calico.

Project Life - Week 25

The stamped “2012” comes from another great set by Ali Edwards for Technique Tuesday. I hope you’re ready for some more Project Life pages coming soon! I photographed 3 of my latest spreads and will get them up shortly. 🙂

New kits at DDE

Here are some more pages with the latest kits by Digital Design Essentials. The first one has some gorgeous fall colors.

This kit was perfect to scrap this picture, since it matches perfectly the colors of my scarf! 🙂

Colors of Fall, sister
Credits:

And this one has some very elegant patterns and colors!

I used it to scrap a picture from the pumpkin patch. I also used some journaling cards in my Project Life album, I will be sharing that shortly. 🙂

Ready for Halloween
Credits:
Font: DJB Jennifer Script

And then I used this adorable kit to scrap an adventure we had lately. 🙂

It’s fun when themed kits help to tell the story!

My Hero
Credits:
A Knight’s Tale kit and A Knight’s Tale alpha by Digital Design Essentials
The Hammer Head font by Heather Hess

That’s all I have for now! I will be playing with Gina’s latest kit shortly, check it out while it’s on sale for $2!

New Team!

Back in September, Gina Cabrera of Digital Design Essentials had a CT call. I was lucky enough to be picked, and I am thrilled to be creating for her! She has an uncanny eye for design and I love her style so much! Here are a few of her creations that I used first.

This alpha goes with the kit so well!

I love all the wood in this kit! It just makes my think of home and family.

Feels Like Home
Credits:
The Good Stuff kit and The Story Alpha by Digital Design Essentials
Fonts: Traveling typewriter and FG Jeana

And I loved this kit and the woodgrain so much that I even fired up my Silhouette to make a card:

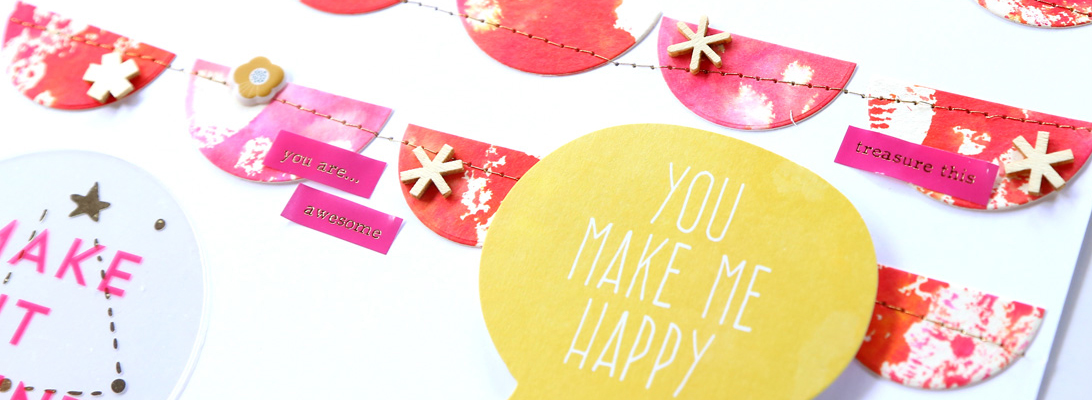
You Make Me Happy cardt

Those gorgeous frames are a freebie, check out Gina’s blog. 🙂
I also used this fun kit that combines several of the latest trends: photobooth props, doodled frames, speech bubbles, mustaches, and more.

And check out this alpha!! It’s the perfect scrabble tile alpha! I’ve been wanting an alpha like this for like forever!

It is so easy to put together a page with such gorgeous designs!

Making Memories

Credits:
Photo Booth Fun kit and Scrabble Alpha by Digital Design Essentials
Font: FG Jeana

I made these pages over a month ago, and I’m happy to be able to share them finally. I will post more soon! Thanks for letting me share my excited about joining this team! 😉