Document Your December at The Lilypad

I wrote this post for this’ year’s Document Your December at The Lilypad. Disclaimer: this post contains some affiliate links to Amazon where I purchased many of my supplies (I purchased them all at full price, but if you use my links I’ll get a small commission towards future purchases).

___________________________________________________________________________________________________________________

I have been making a December Daily album since 2010, and have always mixed in hybrid and physical products. Over the years, I’ve experimented with many different sizes and systems, and I’d love to share my experience with you! Of all the projects I’ve embarked in, this is definitely my favorite and that’s why I’ve kept at it for close to ten years now.

Here are the eight albums I’ve completed so far, 2010-2017.

Yes… I am a year behind! And that’s OK. Most of the years I complete my album in December / early January, but for the past couple years I’ve ended up putting together the album almost one year after the fact. But I always get it done, because of how precious these albums are to me.

Getting started…

If you haven’t done any hybrid projects, I recommend you warm yourself up to this month-long project by making some cards first. But be forewarned… it’s how I got into hybrid myself, and it’s a slippery slope! 😀

First of all, figure out if you want to outsource your printing, or if you want to print at home. The latter is what works best for me, as I like to get things done in one sitting (i.e., design on my computer, print it out, and put it together). I use a Canon Pixma printer. It has a letter sized paper tray, as well as a smaller tray that fits 4″x6″ paper, which is super handy!

Essentials supplies include: printed digital designs and photos, scissors or trimmer, a ruler, and your adhesive of choice. I use a Fiskars Procision trimmer, as well as a Tonic Studios mini guillotine, and Tonic Studios Tim Holtz scissors for cutting. My Tim Holtz ruler is my favorite since it’s clear. For adhesives, I love Gunglider pro tape for larger things, and a glue pen for small embellishments and sequins.

Gather other supplies you may want to use, which can include physical scrapbooking products, stamps, paint, washi tape, cutting machines, sequins, glitter… the sky’s the limit!

TIP #1: Find the process that works for you

There are 3 options: 1) prepare your foundation pages ahead of time; 2) work as you go, in December; 3) put together the album after the fact. I’ve done all three, and that has helped me figure out my preference.

In 2010, my first year, I made the album in advance, since I knew I’d be traveling for most of the month. I used a 6”x4” ring binder, and used my digital cutting machine to add fun borders to the pages. However, since I was traveling, I didn’t have a chance to put together the album until after my trip. This experience taught me that options 2 and 3 are more suited to my style (I like to match each page with the day’s photos).

TIP #2: Choose the format that works for you

I have tried many formats over the years, because I like to switch things up.

I have used ring albums, either by making the pages myself, or by using page protectors. And I have also made some albums from scratch.

Here are a few examples of all of these options. In 2010 I used a ring album, and made my own base pages. In 2011, I made my album from scratch (this is still a favorite out of all the albums I’ve made!), and in 2012 & 2013 I used ring albums with page protectors.

Having a set format with page protectors helps me speed things up. It is also very easy to use the 3”x4” and 4”x6” journal cards from the Document Your December products.

TIP #3: Choose the layout

Do you want to dedicate a single page to each day of December, or an entire spread, or just base it on what content you have for the day? … this brings us to my next tip.

TIP #4: Choose the content that you want to include

Everything that happens in December, or only holiday events? I have decided to only include holiday related events my albums.

TIP #5: Make it cohesive

You may want to stick to a particular color scheme throughout your album. Monochromatic albums always have a striking effect. In 2016, I made my album using a black traveler’s notebook, with metallic accents throughout, and adding a touch of color with printed digital designs.

But overall, while I admire the classic elegance of albums with a cohesive color scheme, I usually end up mixing different colors throughout the album. If you prefer to switch things up like me, you can add a common element throughout the album, such as a date element, to give continuity.

In my 2017 album, I used the December Days No 4 (Numbers) by Sahlin Studio throughout, and applied the DYD 2018 | Glitter Styles by Mommy-ish to change the color to match each page.

Whatever your preference may be, the best part is that the Document Your December products will make it possible for you to fit any theme you choose!

TIP #6: Add memorabilia!

One of my favorite aspects of making a hybrid album, in addition to the customizability, is that you can add memorabilia in your album! I’ve saved holiday themed paper supplies, gift wrap, and paper coffee cups to add into my albums.

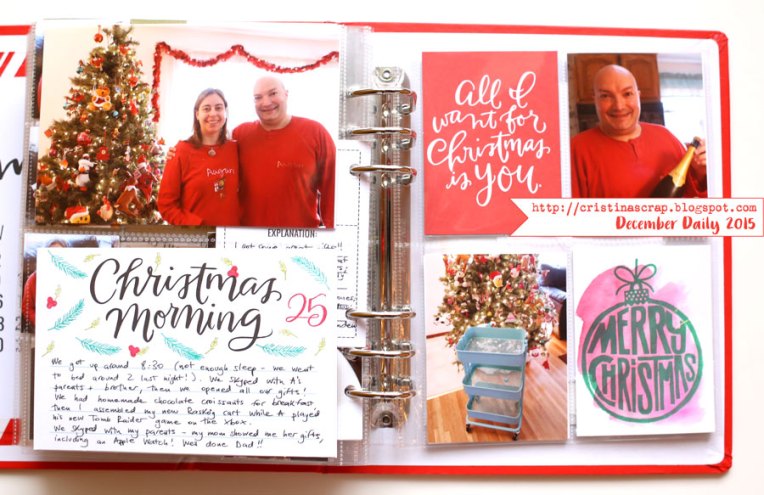
This is an example of how I included a paper bag and pieces cut out from a coffee cup in my 2015 album.

TIP #7: Embellish!

The fun part is to add physical embellishments to add interest to your pages.

And don’t forget to decorate the cover and spine of your album!

OK, now that we’ve covered the basics, I’d like to show you what I have started putting together with the newest Document Your December supplies.

I decided to use a small 4”x4” ring binder that I purchased years ago. I also have acetate numbers to go with it, and I measured them to figure out the size of my digitals.

Since I love incorporating different textures in my albums, I printed a few designs from The First Sign – Kit by The Committed Crafter and from the Lumi Collection by Lynn Grieveson onto vellum paper. (Note: when printing onto vellum, make sure to use the vellum setting on your printer, or use the quick draft option).

I used an 8.5”x11” sheet of vellum so I also used some older DYD pieces to fill up the whole page.

Here you can see my Fiskars Procision trimmer in action. I love it! And it also folds up to half size if you are cutting smaller things, or for storage.

s


Document Your December with The Lilypad!

Hello! As promised, I’m here today to share a few of the pages I made for my 2017 December Daily album using the Document Your December products from The Lilypad.

The traveler’s notebook cover is a passport size from Foxy Fix in Sugar Coconut leather, with a gold foil embossed pine tree.

And here are a few of the pages I made.

Supplies:
Home for the Holidays | PapersHome for the Holidays | ElementsDecember Days No 4 (Numbers)Home for the Holidays | Journal Cards 1 by Sahlin Studio
Deer from Alpine Bundle by Rachel Jefferies

Supplies:
Merry Everything Elements and Merry Everything Cards by Sahin Designs
December Days No 4 (Numbers) by Sahlin Studio

Depending on what happened each day, I dedicated a whole 4″x6″ page to it, or combined it with other days.

Supplies:
Fa La La La La: Bundle by Rachel Jefferies
December Days No 4 (Numbers) by Sahlin Studio

And in some case, 2 pages for one day.

Supplies:
Home for the Holidays | ElementsDecember Days No 4 (Numbers) by Sahlin Studio
Alpine Bundle by Rachel Jefferies
The snowmen are a physical stamp from Mama Elephant, which I colored with Copic Ciao markers.

Supplies:
Alpine Bundle by Rachel Jefferies
December Days No 4 (Numbers) by Sahlin Studio
DYD 2018 | Glitter Styles by Mommy-ish

I think this next spread is my favorite so far. 🙂

Supplies:
Home for the Holidays | PapersDecember Days No 4 (Numbers)Home for the Holidays | Journal Cards 2 by Sahlin Studio
DYD 2018 | Glitter Styles by Mommy-ish

So festive!

Supplies:
Fa La La La La: Bundle by Rachel Jefferies
DYD 2018 | Glitter Styles by Mommy-ish
December Days No 4 (Numbers) by Sahlin Studio

Supplies:
Fa La La La La: Bundle by Rachel Jefferies
DYD 2018 | Glitter Styles by Mommy-ish
December Days No 4 (Numbers) by Sahlin Studio

I’m a little bit over halfway through the album, so I hope to complete it soon, so I can start thinking about this year’s album! What about you, do you make a December Daily album? If so, what format are you using this year?


December Daily 2017

Last year I didn’t make a December Daily album, because I was too busy. First Christmas in our new home, and my parents came to visit – it was a wonderful Christmas! So of course I want to document it after the fact. And now it is the time to make it happen!

For this year, I decided to use a passport traveler’s notebook. The individual pages are 4″x6″, which is a great size for hybrid.

The notebook cover is by Foxy Fix and it is just perfect for Christmas! It’s a single passport (size #1) in Sugar Coconut leather, with a gold embossed pine on the front.

I’m now halfway through making the pages (since it’s a traveler’s notebook, I need to work on the first days of the month alongside the last days, so I have days 1-10 and 26-31 done at the moment. :). I’ll be sharing a bunch of pages after the new Document Your December products get released at The Lilypad this Friday!

Document Your December

Hello hello! I am so happy to share with you the pages I made with the new Document Your December products that were released today at The Lilypad! I seriously couldn’t stop creating this week! I took out all my photos from last year that I hadn’t scrapped (except for my December Daily album). And everything is 30% off this weekend!

Credits:

Do you have an Elf on the Shelf? We do and it’s such a lovely tradition!


Credits:

Last year I bought a selfie stick and it was perfect to take this picture! 🙂

Credits:

I just love these brushes and illustrations!

Credits:

Merry and Bright bundle by Lynne-Marie

This page is about one of our holiday traditions.

Credits:


I love all the pages I made with the DYD, but this one might just be my favorite! The papers are so good! I printed some out to use in my December Daily album too.

Credits:

I love how this looks like it’s an open album! These are printables for your planner but here I just used them as an extra layer on my page – so fun!

Credits:

I’m so excited also to be using these products in my hybrid December Daily album for this year!! I’ll be sharing that in December here on the blog.

It’s Beginning…

It’s that time of the year… Christmas is almost 2 months away and I love that there are so many opportunities to help us get ready. Studio Calico has some great classes available, and I’m always happy to get more inspiration!

First up is the

KEYSTONE CABIN WORKSHOP

It’s the most wonderful time of the year—for making and capturing memories! Join April Foster, Lisa Truesdell, and Kelly Noel for the perfect holiday retreat into creative ways to use the new “Keystone Cabin” collection to document your favorite moments this season. From fresh sketches and videos, to inspiring photo and journaling prompts, you’ll learn plenty of tips and tricks for using this exclusive collection to bring a rustic but modern feel to your scrapbook, pocket, and traveler’s notebook pages!
Class begins on November 1st!

I can’t wait to see what these ladies will be sharing in the class!

Next, they are re-releasing some past classes for even more December inspiration!

25 DAYS CLASS BUNDLE

Get in the Christmas spirit! Revisit our past holiday classes to get endless inspiration for your December 2016 projects. Our 25 Days series has housed some of our most popular classes, and they’re all back for a limited time, along with last year’s Wrapped! Many of the industry’s biggest names have collaborated on these classes, and the outcomes have been nothing short of incredible.
The bundle includes 5 classes:
December Daily | 2015, team taught
Wrapped with Amanda Rydell
25 Days | 2014 with Stephanie Bryan
25 Days | 2013 with Maggie Holmes
25 Days | 2012 with Maggie Holmes.

These classes originally retailed for a total of $130 – you’ll save over $100 by enrolling with this bundle. These classes are also available for $10 each through the remainder of 2016. This offer will expire December 31st at 11:59pm EST.

Have you decided on your format for December Daily yet? This will be my 7th time doing this project. Check out my 6 past albums here.

And here’s a look at all six of my December Daily albums.

I am still debating because it looks like I will be traveling for a good part of the month… currently it’s a toss up between a traveler’s notebook and a pocket page album.

December Daily 2015 Recap

One more December Daily post for the year.. a recap of my 2015 album. This is my 6th year completing a December Daily album, and the first time I’ve bought a DD kit.

I have to say that using the kit and a mini kit add on really made it easy to put the album together without losing too much time digging through my stash. The spine of the album I chose was pretty thick, yet I was surprised that I ended filling it all up!
Most of my spreads are dedicated to a single day, with just a few instances of 2 days combined in one spread.

I also loved the approach I took this year, inspired by Ali Edwards, to focus more on the stories rather than making sure to have one Christmas-related photo per day. This has been incredibly freeing!

I had a lot of content of the kit and mini kit leftover, especially papers, so after finishing up my 2015 album on the 26th, I powered through and got my 2014 album finished too.
Last year, my December Daily album got halted by a work emergency that occurred mid-month, and after December I just didn’t feel like going back to my album, which sat unfinished, with only days 1-7 completed.
But this year, after completing the 2015 album, I felt on a roll, and I was inspired to use the new supplies from this year on last year’s album.

And here’s a look at all six of my December Daily albums.

Thanks for following me on my December Daily journey this year!
______________________________________________
Catch up on my previous 2015 December Daily posts:
Title page
Dec. 1st
Dec. 2 and 3
Dec. 4th
Dec. 5th
Dec. 6th
Dec. 7th
Dec. 8th
Dec. 9 and 10
Dec. 11th
Dec. 12 and 13
Dec. 14th
Dec. 15th
Dec. 16th
Dec. 17th
Dec. 18th
Dec. 19th
Dec. 20th
Dec. 21st
Dec. 22nd
Dec. 23rd
Dec. 24th
Dec. 25th

December Daily 2015: Day 25

And so we have gotten to the last day of my album! Christmas Day.

I did some minimal embellishing but really, it’s mainly about the photos for this day.

This first spread is about opening gifts.

I used a digital brush by Ali Edwards on top of my photo. Christmas breakfast is one of my favorite traditions! The journaling card is from the Jasmine Jones mini kit.

On the back of the journaling card I detailed the gifts I got. My husband totally surprised me with an Instax mini camera!

I embellished the card from the mini kit with some stamping using a set from Ali Edwards and color theory inks.
And after the gifts, it’s all about the food! 🙂

The card at the top is again from Jasmine Jones’s mini kit, while the one on the bottom was letterpressed by me using a plate by Studio Calico.
I even assembled my Raskog card on Christmas morning. 🙂 It’s my second one, and I love to house my Studio Calico stamps!

More cards from the mini kit here. The photos were assembled using these incredibly handy photo collage templates from The Lilypad.
I hand lettered our menu, which was incredibly festive this year, courtesy of Costco! 🙂 The alpha stickers are from Ali Edwards’s December Daily kit.

And that wraps up my 2015 album! I will post tomorrow a photo of the full album – it’s really quite full! I hope you’ve enjoyed my daily shares!
______________________________________________
Catch up on all my 2015 December Daily posts:
Title page
Dec. 1st
Dec. 2 and 3
Dec. 4th
Dec. 5th
Dec. 6th
Dec. 7th
Dec. 8th
Dec. 9 and 10
Dec. 11th
Dec. 12 and 13
Dec. 14th
Dec. 15th
Dec. 16th
Dec. 17th
Dec. 18th
Dec. 19th
Dec. 20th
Dec. 21st
Dec. 22nd
Dec. 23rd
Dec. 24th
Dec. 25th

December Daily 2015: Day 24

Hello there! For December 24, I kept things pretty simple in my album.

Today’s story is about what we did on Christmas Eve.

I used the two journaling cards for my journaling. The adorable vellum mouse is from the Lollipop Guild scrapbook kit from Studio Calico.
The date is stamped with an alpha stamp by Kelly Purkey and Emerald City ink.
The journaling card on the left is from Ali Edwards’s December Daily kit, while the one on the right was from an add on from Studio Calico from a couple of years ago.

For the page on the right, I filled in the 2″ slots with some paper from an old Basic Grey collection and with some bits I printed out on transparency paper (the gifts are by Wilna Furstenberg, and the Merry Christmas is from Studio Calico).
______________________________________________
Catch up on all my 2015 December Daily posts:
Title page
Dec. 1st
Dec. 2 and 3
Dec. 4th
Dec. 5th
Dec. 6th
Dec. 7th
Dec. 8th
Dec. 9 and 10
Dec. 11th
Dec. 12 and 13
Dec. 14th
Dec. 15th
Dec. 16th
Dec. 17th
Dec. 18th
Dec. 19th
Dec. 20th
Dec. 21st
Dec. 22nd
Dec. 23rd
Dec. 24th
Dec. 25th

December Daily 2015: Day 23

I certainly cannot pick a single favorite spread in my album, but I do have a few that I really love.. and today’s spread for December 23rd is certainly one of them.

This spread makes me so happy. I combined a lot of my favorite things here – letterpress, watercolors, stamping & embossing, and gold foil. 🙂
Today’s story is all about the gifts I bought for my family this year.

The card at the top left was made with an old Studio Calico letterpress plate, my Big Shot die cutting machine and the letterpress platform. I added some watercoloring on top with Peerless watercolors (currently sold out at Studio Calico but you can find them on Amazon too).
The gold foiled card was in the Jasmine Jones December Daily mini kit, and I simply added a puffy sticker from Pinkfresh Studio.
On the card in the bottom pocket (also from the Jasmine Jones December Daily mini kit) I added stamping with versamark ink and embossing with Rouge Zing embossing powder. The stamp images are from Pinkfresh Studio, while the alpha stamp is from Studio Calico.
The gold foiled label was from an old Studio Calico kit. I wish they made more of these!

The puffy stickers and acrylic presents are from Pinkfresh Studio. The paper in the top pocket is from the December Daily kit.
In the pocket at the bottom, I stamped a floral stamp from Pinkfresh Studio right on the chipboard numbers from the December Daily kit with versamark ink, and embossed it with Powder Zing embossing powder. I love how it matches the gold foiled leaves in the previous page.

This post contains some affiliate links. If you click on any of these affiliate links and make a purchase, then I happily receive a small commission. Thank you for your support! I purchased all the products you see used at full price, and am happy to share what I made with them here.
______________________________________________
Catch up on all my 2015 December Daily posts:
Title page
Dec. 1st
Dec. 2 and 3
Dec. 4th
Dec. 5th
Dec. 6th
Dec. 7th
Dec. 8th
Dec. 9 and 10
Dec. 11th
Dec. 12 and 13
Dec. 14th
Dec. 15th
Dec. 16th
Dec. 17th
Dec. 18th
Dec. 19th
Dec. 20th
Dec. 21st
Dec. 22nd
Dec. 23rd
Dec. 24th
Dec. 25th

December Daily 2015: Day 22

I hope you had a wonderful Christmas! Ours was very nice, with family time, great food, and relaxing. I am working on the last page of my album (25th) and today I am sharing the Day 22 spread. Just a few days left of this daily blog series then. I hope you’ve been enjoying it!

For today’s spread, I went with a non-Christmas color scheme to match the non-traditional winter weather we’ve had this year.

The cards/papers, overlay and enamel stars are from Ali Edwards’s December Daily kit and the Jasmine Jones add on. The stamps and embellishments are from Pinkfresh Studo.

This overlay from the December Daily kit was perfect to make a fake snow scene.. Oh how I wish we got some snow for Christmas! But there was no chance this year. Booo.

I did some more brush lettering on the journaling card. I started out using a yellow color, but it was too faint, so I traced over it with orange. You can still see a bit of the yellow that makes a shadow effect.
______________________________________________
Catch up on all my 2015 December Daily posts:
Title page
Dec. 1st
Dec. 2 and 3
Dec. 4th
Dec. 5th
Dec. 6th
Dec. 7th
Dec. 8th
Dec. 9 and 10
Dec. 11th
Dec. 12 and 13
Dec. 14th
Dec. 15th
Dec. 16th
Dec. 17th
Dec. 18th
Dec. 19th
Dec. 20th
Dec. 21st
Dec. 22nd
Dec. 23rd
Dec. 24th
Dec. 25th