Coming Soon…

The PDP girls did it again!! They have a new kit coming soon, and I know you’ll love it! Here’s a little sneak peek:

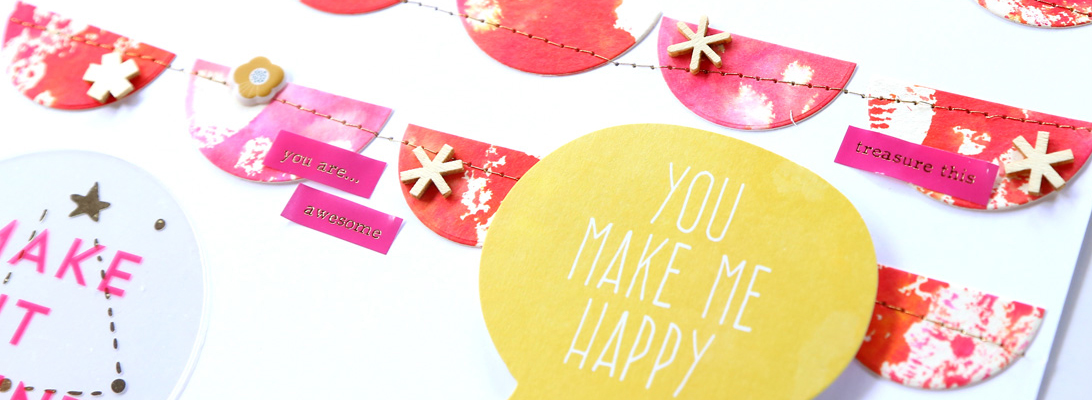
The colors are super funky and the doodles are super cute!
The kit is a collab with Amy Sumrall and will be in the shops Friday. I’ll be back then to post previews and links to the stores. 🙂
I bet this kit will be perfect to scrap a few pictures I have left from Valentine’s Day! In the meantime, I used another great kit by Amy and Lauren (probably my favorite ever), We Give Thanks, to complete another page about the Valentine’s Day hunt. 🙂

Credits:

Template by Amysout

We Give Thanks by Polka Dot Plum

Font: Note this

But I have more great news: the template I used for this LO was created by a fellow CT member, Amy, and is avaliable on the CT blog! Go get it right away! 🙂

Toot!!!

I am really proud to say that the LO I posted yesterday was chosen to be scraplifted for the March ’09 Scraplift Challenge at Snap and Scrap! Go check it out here!

Tonight I scrapped the next piece of the Valentine hunt. I’m not done yet! 🙂 More to come soon.
For this page, I used the same kit I used to decorate the small mailbox (tutorial here), Que Sera Sera by Polka Dot Plum. You can find that great kit at ScrapOrchard and Sunshine Studio Scraps.

Polka Dot Plum Blog Train

The Polka Dot Plum CT girls are hosting a 2-week long blog train that you don’t want to miss!

Every day you can collect a quick page made with the gorgeous Sensory Overload:


The first stop is on the PDP blog! My stop is #13 and you should have arrived here from Sharon’s blog!

So, with no further ado, here’s the quick page I prepared for you:

As you can see, it’s very versatile, so you can use either of the 3 rectangles to place photos and/or journaling. Flip it, play with it and personalize this quick page adding the elements that you prefer!
Here’s an example I did using the 2 taller rectangles to place photos and the other rectangle for the journaling and adding an alpha for the title.

Credits:
Sensory Overload by Polka Dot Plum
Red Plastic Edge Alpha by Cyndi Price
You can download the QP clicking here (the download will start automatically).
Please leave me a comment if you download!
Tomorrow’s stop is Reba’s blog. Make sure you stay on this train till the end!

Week 6

Here’s my week 6! I used Polka Dot Plum’s new kit, Occasionally, for this double-pager.


Credits:

Occasionally (some recoloring) by Polka Dot Plum

Photo stamps from Project 365 #2 by Sugarplum Paperie

Wrecked Alpha by Britt-ish Designs

Font: Note this

Hop on the PDP Blog Train!

The Polka Dot Plum CT girls are hosting a 2-week long blog train that you don’t want to miss!

Every day you can collect a quick page made with the gorgeous Sensory Overload:
The first stop is on the PDP blog!
My stop won’t be until 10 days or so, but make sure to hop on the train and pick up the QP each day! By the end, you’ll have 15 QPs ready to make a complete album!

Occasionally

Amy and Lauren have a new kit out!! Here’s its description, by CT fellow Sharon:

Occasionally you need a kit with a collection of floral patterns and elements, perhaps a plaid or dotted design. There will occasionally be a call for basic unadorned papers and accessories. Red may be just the color you fancy, but occasionally muted tones with just a few frills might fit the bill. Your project may necessitate a diverse mixture of ribbon, stitches, flairs, flowers, frames, notepaper, and occasionally a simple or fancy journaling block. Whether you occasionally scrap or are addicted, you will find Occasionally to be a kit you will go back to more than just occasionally.

And here’s the kit:

Today it’s 20% off so go snag it at Sunshine Studio Scraps or at Scrap Orchard!
Here’s a page I did with it last night:

A Dare!

I did a page for the DigiDares (my first) and I ended up doing something that’s totally NOT my style. But I LOVE the result!! 😉

Credits:
Sensory Overload by Polka Dot Plum
Font: CK Rugged
I used Polka Dot Plum’s gorgeous Sensory Overload – it’s packed with gorgeous stuff and it was just perfect for this crazy page. 🙂

Valentine’s Day Mailbox

Valentine’s Day is less than 2 weeks away and I finally had some time this weekend to play with the $1 mailbox I got at Target.

I choose a very cute kit by Polka Dot Plum to embellish it, Que Sera Sera.

I measured the dimensions of the mailbox and prepared the digital parts I wanted. Then, I was ready to print.
Unfortunately, the mailbox is very small, but not small enough to print on letter paper, if you want to cover the whole side of the mailbox with paper. I used A4 paper because I had some at home (length 11.7 inches) and I could fit everything on one sheet; so your option would be either have this printed at your local print shop on 12 inch paper, or use a 12 inch paper at home, or use multiple letter papers.
I used matte paper because I’ve lately discovered I love it, but glossy photo paper would work too (though it’s more delicate to handle and might get ruined if you’re new to hybrid like me).
Once you have everything printed out, it’s time to cut. I used my cutter+ruler to cut the paper strip for the side, and scissors for all the other smaller bits.
To adhere properly the paper strip for the side behind the flag, I cut a small indentation on both sides of the paper in correspondence of the flag, so it would fit in nicely.
To cut the front and back parts of the mailbox precisely, I recommend first tracing the outline of the door with a pen/pencil and then cutting it out with scissors.
Now that we have all the pieces ready, we’re ready to glue. I used Mod Podge applied with a foam brush. I only used a very small quantity of Mod Podge and it worked very well.
Now it’s time for some embellishments! I didn’t have any matching ribbon, so I only applied a few buttons (I bought a 200 multi-color button pack at WalMart for $.88), sticking them with glue dots.
I used one to cover the ugly metal thing that holds the flag:
and a few for the front and back:
A very simple and cute project for Valentine’s Day! You can fill it with candies or small treats and a card, or just let it sit somewhere in your house (as I will!) to decorate for Valentine’s Day.