Homespun Documenter – Main Kit Only

I have tons of pages to share made with the Homespun kits from Studio Calico. But truly.. the Documenter kit and add ons were all so good!! I had purposefully held back in documenting my January, and was able to get caught up easily with all these new products. Today, I am sharing what I made with the Documenter main kit only.

This kit stretches pretty far!

I loved all the pink in the kit, but since I know not everyone is a fan, I decided to avoid pink in this main kit spread, so I chose teal and red as my main colors, with some black.

The silver foil on the card I used for the title is so pretty! I did some creative use of the alphabet letters – since there was only one “w”, I used the “n”s instead.

I used those pretty kraft labels with silver foil accents throughout the spread as a cohesive accent.

I love how the gray rubber word pops against this red card! Oh and a PSA – use staples to attach these rubber pieces, it looks like glue dots have a messy reaction, while staples work great.

I loved the card that said “good times”, but it had a bit too much white space, so I cut out the circle and layered it on top of the woodgrain card, and added my journaling around it. I also used the hang from the stamp set to turn the circle into a framed piece.

There is a lovely set of kraft labels with silver foil in the kit, and I decided to use the leftover backing as a background for this card. Since I like to use up my scraps, I backed it with a couple of pieces I had left over from cutting some cards. I love how it turned out!
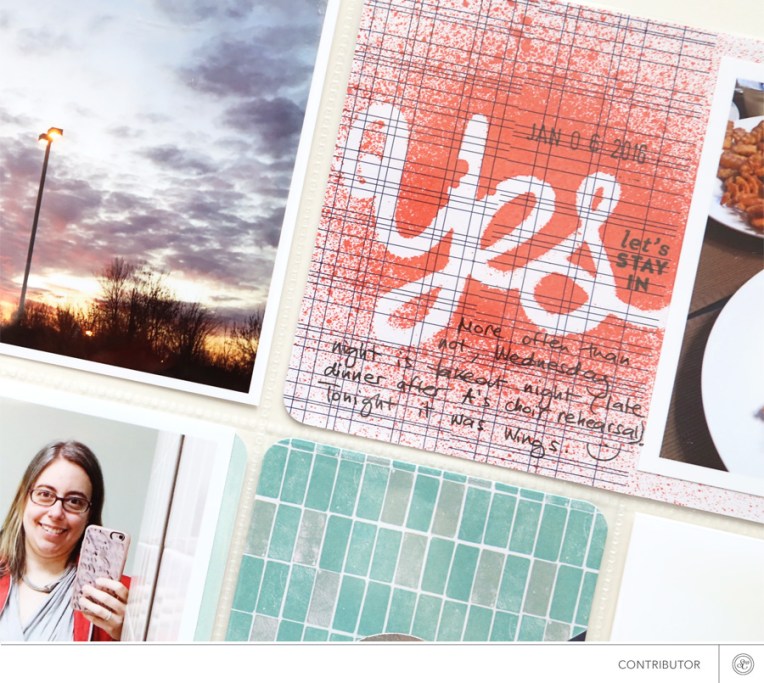
The rubber pieces in the kit are adorable as is, but you can stretch them even further by using them as a stencil. Here, I used some Studio Calico mist to spray over the word in red.

I loved the “boss” card in the kit, but it was too black for my taste, so I just cut out the sentiment and layered it on top of another card. I also cut apart the black card and layered it on top of the other one.

The silkscreen that comes in the kit is so much fun! Seriously.. so pretty! I used it a few times here with black paint – it’s so easy to customize your cards! As part of the kit, you can also pick a color of paint out of three options. Here, I used black to stick to my color scheme.

The stamp set is really cute and versatile – I used it throughout the spread, and here as well.
Check out the Documenter kit here.
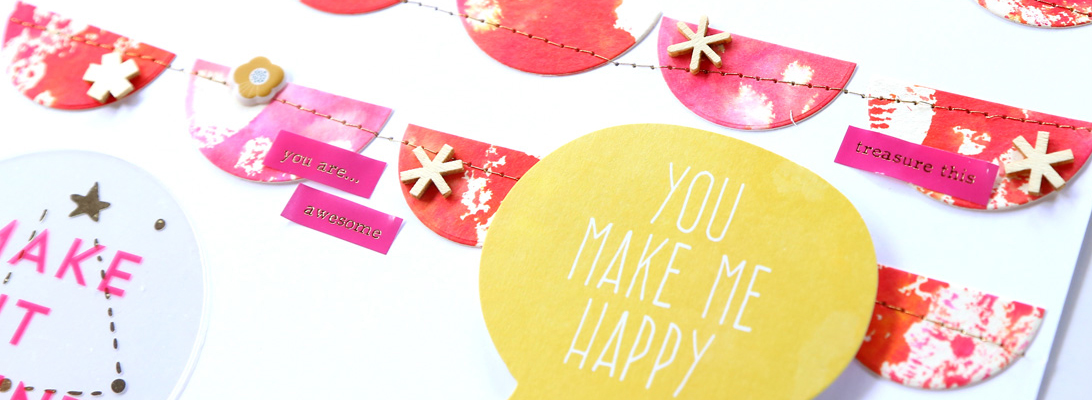
Homespun Documenter Kit and Add-Ons

This is the second Project Life spread I made with the Homespun release from Studio Calico.

The Documenter add ons are spectacular this month! In particular I am in love with the stamps by One Little Bird (everyday documenter and “on the menu”) – I know I will be using them over and over!

For this spread, I used pink as my main color – the “yeah” transparency from the main kit is fun!

This was definitely an unusual week – I had a small surgery on the Monday, and stayed put at home for the rest of the week.

I had fun stamping directly on the photos too – the Color Theory dye ink pads work great for that.

I used neon pink embossing powder with the everyday documenter stamp. I always add the week number to my spreads and this stamp set is just what I needed! It also comes with months, days, seasons and numbers – perfect!

The tags in the Pocket add on are so fun and bright (and hard to photograph…), and I decided to tone this one down with some white mist. I used one of the rubber phrases from the Documenter main kit as a mask.

There is a pretty set of puffy stickers by Pink Paislee in the Pocket add on.

Love these stamps (everyday documenter and “on the menu”)!

This is my favorite card of the entire spread! I stamped the “be cozy” from the Documenter main kit around this lovely bunny card from the Easter set.

More stamping with the everyday documenter and “on the menu” stamps.

Here you can see the numbers from the everyday documenter in action, plus the stamp from the Pocket add on.

Day by Day 2016 Class at Studio Calico

I have been doing Project Life since 2012, in 12″x12″ format, and will continue to make weekly 2-page spreads (24″x12″) in 2016 as well. This is a project that brings lots of joy to my memory keeping. This post contains some affiliate links. If you click on any of these affiliate links and make a purchase, then I happily receive a small commission at no cost to you. Thank you for your support!

Since this will be my 5th year doing this project, I already know what works and doesn’t work for me, but I am always game for some inspiration. Also, I find that having a community to share my process with is a big incentive to keep going. That’s why  I will be taking the Day by Day 2016 class bundle at Studio Calico – a series of 4 classes with some wonderful inspiration for the whole year.

The first class in the series is Kickstart and it starts on January 1st. My favorite part of the classes at Studio Calico is that not only you get fabulous inspiration through the lessons, but you also get access to a message board with all your fellow classmates – I find that I learn a lot from the community!

I’m excited about all of these classes, but especially the lettering one – I started dabbling into lettering this fall and even started introducing some in my December Daily album (see here and here), and I’m excited to do that in my Project Life album too!
If you sign up for the bundle, you even get a gorgeous 4″x6″ stamp for free if you purchase the bundle before Dec. 31st:

The Kickstart. class starts on Jan. 1st – I hope to see you in class!

Embossing Love

A couple months ago, I took the plunge and bought a manual die cutting machine. After considering the options (namely the Cuttlebug, which is smaller and less sturdy), I decided to get the Big Shot. My main motivation to buy it was to use it with wafer thin dies, but I also bought an embossing folder, just to try it out… and I have fallen in love with embossing!

I really love the results! Here are a few cards I made for my Project Life album.

Embossing folder: Amy Tangerine

Embossing folder: Tim Holtz


Embossing folder: We R Memory Keepers

Embossing folder: Cuttlebug (left)          Tim Holtz (right)

I have been playing with creating a faux letterpress look. I just used some Hero Arts shadow inks for this card.

This one is probably my favorite plate set! By We R Memory Keepers

Seriously.. embossing, where have you been all my life?? 😉

Project Life – Week 14

This week I seriously risked getting the week number wrong! For some reason, I was thinking this was week 13, even though I had just completed the real week 13, and when I was digging into my stash looking for papers and came upon the Fourteen 6×6 paper pad by Crate Paper, I made a mental note to save it for the following week. 🙂 Luckily, shortly thereafter I realized that this was indeed week 14, and was able to use up some of that paper, which was just perfect. 😉

Most of the papers are from the gorgeous Maggie Holmes collection by Crate Paper – I’m seriously in love with it, and I am glad I cut into it as soon as I got it! 😉

As usual I had plenty of pictures for this week, so I made some collages, and used several small photos.
OK, here are the details!
That gorgeous floral paper is from the Maggie Holmes collection. The washi is from the March PL kit at Studio Calico. I used the Maggie Holmes thickers and a micro mono alpha by Basic Grey. I recently got the pretty Dear Lizzy 5th &Frolic date stamp – I love that it has the days of the week! I used some gelatos to highlight the week on the Amy Tangerine calendar stamp.
More of the Basic Grey alpha, combined with a white Poster Sharpie, to make the title. I used some enamel dots to accent my journaling on this pretty doily card from the Maggie Holmes collection. I think this detail is my favorite for this week! 🙂
Fourteen paper, with some gelatos in the background.
TOP: Vintage Studio Calico stamp, and layered My Mind’s Eye washi tape.
BOTTOM: Maggie Holmes collection, and a stamp from the April Studio Calico Project Life kit.

TOP: the pretty paperclip was in the POP 2 class (running this month at Studio Calico; registration is over) kit. The paper is from the Maggie Holmes collection, and the hearts stamp is from Today Noted by Blinks of Life for Studio Calico.
BOTTOM: 3×4 photo collage by Designs by Lili.
A paper from the Maggie Holmes collection, painted with gelatos, and layered with a tag from Dear Lizzy Neapolitan and enamel dots.
Card from the Studio Calico March PL kit (love how it matched my color scheme!), and a word cut using my Silhouette and gold POW glitter paper — seriously cuts like butter!!
Another cut done with my Silhouette, backed with some pretty papers. I cut the quote using the fonts Naked and Janda Elegant Handwriting with my Silhouette, and backed it up with Amy Tangerine Ready Set Go (Coffee Break); Basic Grey 6×6 Fact paper pad; Dear Lizzy washi from Neverland PL kit by Studio Calico; Basic Grey Fiction 6×6 paper pad; Basic Grey Kissing Booth 6×6 paper pad.

Another paper from the Fourteen 6×6 paper pad layered with a tag from Dear Lizzy Neapolitan. The stamps are by Studio Calico (summer stamp school and PL kits).

Awesome Project Life News

I have some awesome news to share! I was asked to contribute to a year-long Project Life class over at the French website entreARTistes. Check it out:

I cannot believe the talent that is surrounding me in this photo collage!! I’m still pinching myself for being asked. 😉 Here’s a list of the contributors:

Karine Cazenave-TapieCéline NavarroEdwige BufquinAmy TangerineOla MamokLisa TruesdellSasha FarinaNatalia BunCristina C. (THAT’S ME!!), Kelly PurkeyLiz TamanahaLeena LohJanna WernerMarcy PennerWai SamMagali MaleingeEmma ChauvinEvelyn Pratiwi YusufCécile PottierSoraya Maes and Geralyn Sy.
The class is offered in French, and each week of the year there will be a new PDF full of inspiration. Heck, I would say that it’s great inspiration even if you don’t speak French! 😉 I will be contributing two PL spreads throughout the year. I finished my Week 13 last week and haven’t shared it on the blog, because I am planning to use it for the class (it’s one of my faves ever, and I am so excited about how it turned out!). I will check if I can show a peek or two later on on my blog. 😉

Project Life – Week 12

It’s time to share my Week 12!

Project Life 2013 - Week 12

This week the colors of my photos were much more muted than they usually are, so I guess this spread looks less colorful than my usual style, but I love how it turned out. 🙂 All of the journaling cards I used are from one of the past 4 Studio Calico Project Life kits.

Project Life 2013 - Week 12
The left page is a Design F. I added in touches of pink to give it a cohesive look. I printed a few big photos, but the majority of the photos this week were cell phone pictures and I kept them small because their point was mostly to tell the story.
Project Life 2013 - Week 12
I used a Design C Photo Pocket page for the right side. Now let’s see some of the details!
Project Life 2013 - Week 12
Here I used Amy Tangerine’s calendar stamp and some stamps from last year’s Studio Calico Pop of the Page class (v. 2 is coming next month, and I’m all signed up for it – can’t wait!!). Alpha and gold sequin from Michael’s (Recollections). The washi on the right was from the March PL Studio Calico kit.
Project Life 2013 - Week 12
This is my favorite slot of this week’s spread! I love this photo, and the white space was perfect to add some embellishments. 😉 I layered a ticket from the Dear Lizzy 5th and Frolic die cuts, a Studio Calico paper clip, a Dear Lizzy stamp stamped with gold galaxy Brilliance ink by Tsukineko, and a wood veneer bird.
Project Life 2013 - Week 12
I stamped the Ali Edwards hearts stamp with gold galaxy Brilliance ink by Tsukineko. The two labels are digital printouts, one by Mari Koegelenberg and the second by Digital Design Essentials.
Project Life 2013 - Week 12
I had tons of pictures this week, so I resorted to layering one on top of some white space on another photo. 🙂 I also layered a Studio Calico past class printable, washi tape and a cute duck shaped paperclip.
Project Life 2013 - Week 12
I bought the Today Noted stamp by Blinks of Life at Studio Calico, and I love it! I used it here with inks from a pearlescent set by Tsukineko.
Project Life 2013 - Week 12
Another printable from a past Studio Calico class.
Project Life 2013 - Week 12

The adorable October Afternoon Woodland stamp was perfect for Easter chocolate! 😉 I used it with Versafine vintage sepia ink.

OK, that’s it for the week. I haven’t quite started on week 13 so I am a bit behind, but I cannot wait to start… I love working on this project so much!

Project Life – Week 11

This was another fun week to put together!

Project Life - Week 11

Having now received three months’ worth of Project Life kits from Studio Calico, I find that I have used very few cards overall. I have used some cards on each week, but just a couple – this means I have quite a stash left. 🙂 To make myself use them more, I have now sorted them by color, grouping together the cards that have the same color scheme. This week I picked my main color from the new pope card I added in my album, and then went digging in my stash to find cards that matched it (3 cards total from the SC kits). I loved the result! My left page uses a Design A photo protector, while the right page is a Design F.

Project Life - Week 11

The other two main colors for the spread (wood and green) also came from my stash. The wood came from some woodgrain cards by Studio Calico – I got multiple of these in various grab bags and never had a chance to use them, but this week I had the perfect story! The emerald green happened by accident, and I love it! I has been rummaging in the dish where I store various die cuts, and I stumbled upon one of these green buttons (by Jillibean Soup, Neapolitan Bean Bisque Collection) – I loved the color combination, so I searched my stash for more green. 🙂

Project Life - Week 11

OK, let’s have a closer look!

Project Life - Week 11

I used the green from my Colorbox pigment ink and embossed with clear embossing powder, with the Stepping Stone alpha and number stamps. I love the shiny look! I used Amy Tangerine’s calendar stamp with Versafine Smokey Gray ink and one of the Jillibean Soup buttons. 🙂

Project Life - Week 11

I stamped this pretty stamp by Elle’s Studio on vellum paper using mustard Zing embossing powder and Versamark ink, and attached it with the Tiny Attacher. I also stamped the date with my Pebbles date stamp directly onto the photo.

Project Life - Week 11

This is my favorite detail of the week! I cut apart the “&” tag by Bananafish Studio (from the Neverland Studio Calico Project Life kit) and used it on two different cards, adding some journaling with my typewriter. 🙂 In the right pocket, I layered a card from the Studio Calico Darling Dear journaling card set with a diecut frame (by me), onto which I stamped a Days of the Week stamp by Ali Edwards .

Project Life - Week 11

Quote marks stamp from the Black Friday Studio Calico stamp set. “Newsflash” stamp from the Feb. Studio Calico Project Life kit, with mustard Zing embossing powder and Versamark ink. Another Jillibean Soup button.

Project Life - Week 11

This was another fun card to make. I layered a card from the Studio Calico Darling Dear journaling card set on a Becky Higgins Project Life 4×6 grid card, and layered on top of it a label and stamps by Studio Calico (all are sold out). I used the March Studio Calico PL kit stamp, with mustard Zing embossing powder and Versamark ink, to guide my journaling.

Project Life - Week 11

Here I stamped some stamps by Ali Edwards with mustard Zing embossing powder and Versamark ink.

Project Life - Week 11

Yes, I have had enough of this weather already!

Project Life - Week 11

And here’s the culprit! 🙂 The Jillibean Soup button that made me  go with green for my accent color.

Project Life - Week 11

Cards by Studio Calico, and I used a bit of Dear Lizzy tape from the Studio Calico Neverland Project Life kit, since it was green. 🙂

Project Life - Week 11

I embellished this Studio Calico PL card with a Dear Lizzy stamped arrow, and another Jillibean Soup button. I added journaling digitally to my photo (font: Strangelove) and designed it so that it flows onto the card right below it (a couple of photos down here).

Project Life - Week 11

I embellished this Studio Calico PL card with a Dear Lizzy stamped bird, a gold sequin and a piece of Dear Lizzy tape from the Studio Calico Neverland Project Life kit. The arrow was stamped from a sold our Studio Calico set using gold glitter Zing embossing powder and Versamark ink, on vellum paper.

Project Life - Week 11

Stamps are by ?? (bought at Jo Ann’s for $1 each); I colored them using my Neocolor II watercolor crayons. Fun! 😉

Project Life – Week 10

This was a fun week to put together!

Project Life - Week 10

I had quite a few pictures and events to include this week, so I added an insert using the Design H photo protectors. The photo protector on the left is by We R Memory Keepers.

Project Life - Week 10

On the right I used a Design A photo protector.

Project Life - Week 10

The left page is my least favorite part of this spread, but it still has parts I like.

Project Life - Week 10

This is the front and back of the insert. I love how it turned out!!

Project Life - Week 10

And this is the right page. OK, let’s see some details! 😉

Project Life - Week 10

I finally got to use some of my cards from the Clementine kit! I bought it last year and rarely use it, but this “10” card was perfect for this week. 🙂 The arrow stickers are from the Clementine kit as well. I had to add some washi tape (orange striped washi tape is by My Mind’s Eye,) at the top because the card kept slipping out of its slot. The stamp at the top is from the February Studio Calico Front Row Project Life kit, embossed with Versamark ink and Apricot ZING embossing powder. I love embossing!! I love stamping, but only have a limited color supply, while my Zing stash is getting bigger. 😉 I also stamped the Amy Tangerine calendar stamp in Versafine Smokey Gray ink. The blue alpha is by Prima.

Project Life - Week 10

The card is the back of a card from the March Studio Calico Neverland Project Life kit; I used my  Pebbles date stamp and the tab is by Bananafish Studio from the February Studio Calico Front Row Project Life kit.

Project Life - Week 10

I used two stamps from the March Studio Calico Neverland Project Life kit, and embossed with Versamark ink and Apricot ZING embossing powder on vellum paper. The badge is also from the kit. I created the “awesome” word bit, and the round stickers are from the Clementine kit. The background is a Becky Higgins Project Life 4×6 grid card sprayed with Heirloom Blue Mister Huey by Studio Calico.

Project Life - Week 10

I dug out the sold out Awesome stamp set by Studio Calico, and embossed it with Versamark ink and Apricot ZING embossing powder. It turned out awesome!! 😉 I made the word strip, and the card on the right is a recolored version of the one I used on this page, using a design by Digital Design Essentials.

Project Life - Week 10

I love the Darling Dear printed chipboard hearts by Studio Calico!

Project Life - Week 10

Here I used a stamp by Ali Edwards for Technique Tuesday, embossed with Versamark ink and Apricot ZING embossing powder. I layered washi tape by My Mind’s Eye and American Crafts glitter tape. The alpha is by Basic Grey (Fact and Fiction).

Project Life - Week 10

I stamped the Days of the Week stamp by Ali Edwards on the Bananafish Studio tab from the February Studio Calico Front Row Project Life kit, and colored it with watercolor crayons.

Project Life - Week 10

Just used some washi tape on this card.

Project Life - Week 10

This stamp is from the Epic stamp set by Studio Calico; I embossed it with Versamark ink and Apricot ZING embossing powder on vellum paper. I used the Tiny Attacher to attach it to the photo.

Project Life - Week 10

I love how this card turned out! The card is from the Studio Calico Darling Dear journaling card set. I embossed an Ali Edwards stamp with Versamark ink and Apricot ZING embossing powderTape by My Mind’s Eye, and a Darling Dear printed chipboard heart by Studio Calico. The blue camera sticker wasn’t planned to be on the card, but I made a mistake in the journaling so I used it to cover it up. 😉 Stamp from the Black Friday Studio Calico set (sold out)

Project Life - Week 10

Card from a Studio Calico PL kit. The cute little alpha is by Prima. I thought the wood veneer camera by Studio Calico was the perfect touch for this card.

Project Life - Week 10

I embellished these photos with Studio Calico Darling Dear stickers.

Project Life - Week 10

Well, now you know… that’s what my craft corner looks like most of the time! 😉 The alpha sticker is by Basic Grey (Fact and Fiction) and I added a word directly on the photo using a white poster paint fine sharpie.

Project Life - Week 10

And here’s the last card! I had fun using the Glitz roller stamp with Heirloom Blue Mister Huey, and I stamped stamps by Amy Tangerine and the Stepping Stone alpha by Studio Calico with Versamark ink and Apricot ZING embossing powder on a Becky Higgins Project Life 4×6 grid card.

Hope you enjoyed this post! I’d love to hear from you if you did. 🙂