2019 Documenting

{this link contains affiliate links, which means that if you choose to purchase an order I will get a small commission at no cost to you. I only share products that I truly love, and in most cases were purchased by me}

I’m off to a good start in the new year! For 2019, I want to document in 3 ways: weekly Project Life, daily journaling in my Hobonichi cousin (A5 format), and weekly documenting in the Hobonichi weeks traveler’s notebook.

I have gotten started, and I will share a couple projects here, which were inspired by Pantone’s color for 2019: coral.

Here’s my title page for Project Life, made using hybrid cards from The Lilypad’s Memory Pockets Monthly: MEMOIR.

I’m still working on my weekly spread.

And here is my first week in the Hobonichi weeks  (before adding journaling):

Stamps used:

Sakuralala 365: Fuyu, Me Time

Sweet Stamp Shop: Monthly Script Stamp, Year Round, Pour Decisions

Studio Calico: I believe they are all retired, but there is a digital version of the Conrad alpha here. Stickers and washi are from past Documenter kits/Planner kits.

Ink: Distress Oxide in abandoned coral.


What about you – have you gotten started on documenting 2019? I’d love to hear your plans!

Ready for Summer

I went shopping when my mom was visiting, and ended up with a few fun outfits for summertime. So I documented them in a traveler’s notebook spread.

The background is made using an old stamp set from Studio Calico, Cotton Candy, which I inked with distress oxide inks (in picked raspberry and carved pumpkin) and spritzed with water before stamping, to get a watercolored look. Then I added the title using two of my favorite new stamp sets: Conrad and the alpha from the May scrapbook kit, Hey Girl. Here’s closer look at the embellishments:

I look forward to filling up this TN with our summer adventures!

Catching Up

Hello there! I have been super quiet lately because work has been swallowing me, and then my mom came to visit us (yay!) so all my free time was spent with her. But I did manage to work on a few projects earlier this month, so I thought I’d share them here finally.

This was a fun page I made to document a few things I am loving right now. It’s made using the Confidant scrapbook kit from Studio Calico.

Here’s a look at a couple details:

I added some gold acrylic ink splatters. I love the shine and texture they add!

This next page is also made primarily with the Confidant scrapbook kit.

Finally, an all purple page. It’s a color I don’t use often, but I went all in on this page! 🙂

I have also been keeping up in my weekly traveler’s notebook documentation (in my Hobonichi weeks). Here are a couple recent spreads I made.

I hope to be back soon with some fun projects! Until then, have a great rest of May!

Happy New Year!

2018 is here… and can you believe I haven’t scrapped [a paper page] since before moving to our new home, back in September?!? But that is no longer true, because today I scrapped a page!

Of course it had to be a page about the new year. 🙂

I used some old and new supplies, and I love how it turned out!

Happy New Year!

More Cards

I made two more cards this week.. with my craft room still only halfway done, I don’t have much room to work, and my supplies are still mostly in boxes. But I’m glad I made time to play with another of my recent new purchases – the Thanksgiving stamp by One Little Bird.

I stamped the images with Tsukineko Versafine Onyx Black ink, and watercolored with distress oxide inks. Easy and fun!

I love how they turned out! I have a bunch more new stamps that I bought recently and haven’t used yet, so you’ll likely be seeing a few more cards here soon! 🙂

Cardmaking Kick

I’ve been on a cardmaking kick lately! I made these cards last month, before the move, and hadn’t gotten around to sharing them here yet.

This first card – a birthday card for my grandma, uses the 4″x6″ Floral Thank You stamp by One Little Bird, along with the 4×3 Parker alpha stamp by Jasmine Jones.

I stamped the flowers in black ink, then colored them with watercolors, and added some drops of gold mist on top. I even decorated the inside of the card, with some adorable stamps by Lizzie Mackay for Pinkfresh Studio.

For the next card, I used the 4″x6″ Floral Thank You stamp by One Little Bird again, this time paired with the Penny alpha stamp, which I stamped with Versamark ink on kraft cardstock, and colored in with a mermaid marker by Jane Davenport.

Finally, I made this last card again using the 4″x6″ Floral Thank You stamp by One Little Bird. I stamped it with distress oxide ink, then used Jane Davenport’s mermaid markers to color it in. I love how it turned out!!

Here’s a closer look.

I’ve bought quite a few new stamps lately, and I’m glad to have gotten some use out of this set, but I have plenty more that I haven’t inked up yet – better get working! 🙂

A Page and a Sketch

I am in the middle of moving, which entails packing up my craft room. In doing so, I uncovered several leftover pieces of paper and cardstock, and embellishments. While I was gathering them together to put them away, I noticed they went together well, and this page was born. (Shhhh… I was supposed to be packing but ended up making this instead ;))

I love how this page turned out, and it’s made entirely out of scraps!

Here are a couple details:

I used this to make a sketch to be used in one of the LOAW (Layout A Week) challenges I am hosting at Studio Calico this month.

You can play along here!

Weekend Pages

Hello! I had a rather productive weekend and, among other things, completed three 12″x12″ paper layouts. All of them use some old Studio Calico kits that I bought on sale. The first two are made with the Front Row scrapbook kit.

The hearts and black arrows are two sides of the same sheet of patterned paper – I had used a piece of it on this page a couple years ago, and now I used up what I had left.

I also used some die cuts from my stash.

The next page also uses the Front Row scrapbook kit, as well as a bunch of die cuts.

It was so fun to build this collage!

The green/blue/yellow color scheme is so refreshing.

For the last page, I had fun playing with my Distress Oxide inks! For this page, I dug out the Pool Party scrapbook kit from July 2016.

After the mega date stamp… there was the mega wine glass! 😀 Here’s a look at how this page came together.

The colors were inspired by the strips of patterned paper, so I chose some Distress Oxide ink colors to match, and stamped the title with them.

Next, I swiped the ink directly from the ink pad on a piece of clear plastic packaging, misted it with water, and transferred the color onto the alpha cards.

I love this easy and fun way to create a watercolor look with distress inks!

I hope you had a great weekend!

{this post contains affiliate links – if you make a purchase, you’ll support me at no additional cost to you}

Kill My Studio Calico Kit: June 2016- Film Club

Hello and welcome back for another month of Kill My Studio Calico Kit! This is the 14th installment of this series, and in total I have made a whopping (151) layouts. Yay me!

Kill my Studio Calico kit is a monthly series I started on my blog to hold myself accountable and use up my kits. You can subscribe to the Studio Calico Scrapbook kit here.

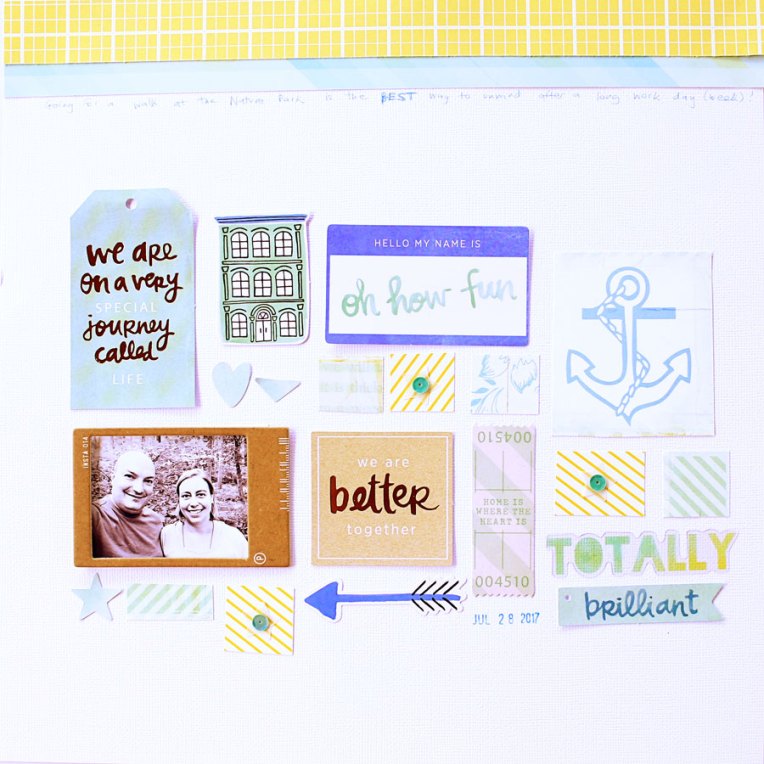
This month I’m using the Studio Calico scrapbook main kit for June 2016, Scout ($34.99 – but I got it when it went for sale for $10).

Notes: I really, really love the kit this month! I loved every single embellishment and found them easy to use,  I also loved the papers, especially the back sides not shown in this photo, except for a couple that were a bit too busy and harder to use. The stamp is great, I love the transparent pieces, chipboard stars, and the gold script words. I loved the specialty paper with the gold foiled constellations! Since I bought the kit on sale it didn’t include the large alpha, but I am never a fan of those.

Status: killed!
I made 11 layouts (6 12″x12″, 5 8.5″x11″), for a total of $10, or $0.91/page. I supplemented the kit with some items from my stash (stamps, ink sprays, and the odd embellishment). Here’s a roundup of all the pages I made:

And here is what I have left:

Leftovers: I have some scraps of paper left, some alpha stickers and chipboard stars, and washi tape. Pretty much killed!

And here is what I made with the kit.

I made a process video for this page, and you can see it here.

I had so much fun making the background for this page! I recently bought ten colors of the Dylusions ink sprays by Ranger, and they are awesome! They blend incredibly well when you add a bit of water, and I love the vivid colors! So as soon as I got them, I made this background to try them out.

I love how this page turned out – I made it to celebrate our 10th wedding anniversary.  I used ten puffy stars, one for each year of marriage, and a bunch of other stars for the years we have ahead. I backed the wood veneer star embellishment with card stock that I misted pink, so it stands out more.

I used the cooler tones of the pretty watercolored labels to add some interest to this page from our trip to Hawaii. I miss this place!! I also added some stamping but it’s hard to see that in the photo.

I love how the specialty paper pops against the kraft background! And yay me for using up some of those pink alpha stickers I’d bought in a sale and never used! 🙂

I had some more fun with the Dylusions ink sprays by Ranger. Also, I used Distress Oxide ink for stamping on the wood veneer and I love how well it worked – no feathering!

Here I added some tags I die cut from leftovers of the previous page – mopping up the excess Dylusions ink sprays by Ranger. And also some embossing on the background.

More leftovers of Dylusions ink sprays by Ranger – I LOVE how this page turned out!

Bunnies are pretty much my favorite thing ever. 🙂 I’m so happy this cutie is hanging out in our backyard this year! I was out of “n”s so I turned two “u”s upside down instead for the title.

This was my favorite paper in the kit and I really wanted to hoard it, but I ended up using it on this page and I’m so glad I did because I love it! And I did some more stamping on wood using  Distress Oxide ink.

On the other hand, this was my least favorite page of the kit, so I’m very proud of myself for using some of it! I cut it into strips and I like the look.

And that’s it! Another kit killed! Thanks for stopping by, and do leave me a comment if you like this series!

You can subscribe to the Studio Calico Scrapbook kit here.

Kill My Studio Calico Kit: April – Film Club

Hello and welcome back for another month of Kill My Studio Calico Kit! This is the 13th installment of this series, and in total I have made a whopping (140) layouts. Yay me!
This month I got the Studio Calico scrapbook main kit, Film Club ($34.99 – and only $5 with a promotion that started that month with the code SCKIT5).

Notes: I really love the colors this month, and the epoxy stickers. The rest of the embellishments were a bit hard to work with at first, but I made them all work in the end.

Kill my Studio Calico kit is a monthly series I started on my blog to hold myself accountable and use up my kits. You can subscribe to the Studio Calico Scrapbook kit here.

Status: killed!
I made 10 layouts (7 12″x12″, 2 8.5″x11″, 1 9″x12″), for a total of $5, or $0.5/page. I supplemented the kit with some embellishments from the Project Life kit, plus some items from my stash (stamps, paints, and the odd embellishment). Here’s a roundup of all the pages I made:

And here is what I have left:

Leftovers: I have some scraps of paper left, several chipboard letters (but I’m out of A’s and O’s, and I used the “1” flipped over to double as an “L” on a couple pages).

And here is what I made with the kit.

For the first page, I cut up the specialty floral paper with gold foil accents.

I love this one! I cut up some of the washi tape strips because I didn’t have a use for them, and I used the words to make up my title.

Here I used the rest of the floral paper.

This was so fun to make! I used my new oxide distress inks to make the watercolored background.

Again using my distress oxide inks for the stamping – this was my first time using them and I wanted to map out the colors. I added some puffy stickers and washi tape from my stash.

The floral paper and the embellishments are from my stash.

I knew I wanted to use the gold star sequins on the red cardstock. I also sprayed the cork “you’ve got style” gold, and added some navy enamel dots from my stash.

I wasn’t sure what to do with the yellow stickers from the kit, but here I paired them with some blue and pink chipboard embellishments, and mounted them on foam dots to give them dimension.

I love how this page turned out! This paper with the labels was my favorite in the kit, but I didn’t like the look of it full page, so I cut out a strip here and used it for my long journaling.

This is a 9″x12″ page for my travel album. I used up the rest of the ticket die cut numbers to mat my photo.

And that’s it! Thanks for stopping by, and do eave me a comment if you like this series!

You can subscribe to the Studio Calico Scrapbook kit here.