Copper Mountain Sneaks!

Happy Christmas Eve! I am quite thrilled that it’s snowing again, after the snow melted all away a couple of days ago. I am hoping we get a white Christmas!

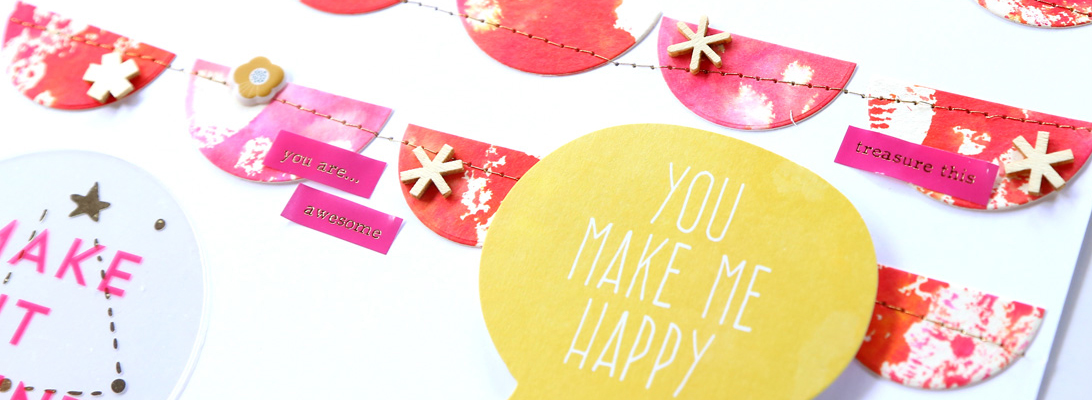
In the meantime, I have some Instagram sneaks of the cards I made with the Studio Calico January kits. I’m very excited to be a card guest designer next month – what better way to start the new year?! ๐Ÿ™‚ First off, I want to show you some sneaks of the Copper Mountain card kit:

ย 

I also got to create with the card add on, and I’ve got to tell you… those stamps are awesome!!

Apparently I cannot stop creating with these gorgeous kits, because I have a couple more cards to share in which I also used some of the digital elements to cut out shapes with my Silhouette. ๐Ÿ™‚

For this last card I combined the whale and fish with some blue POW paper from my stash.. it may very well be my favorite card of the bunch!

OK that’s it for now! I have made seven cards so far, and I may have a couple more in the works ;), so come back on the 27th to see the full reveal!

December Daily 2013 – Days 1-4

Whoops I am a few days late with this post but it’s just been a crazy week. Here are Days 1-4 of my December Daily.

On day 1 I took a picture of our four advent calendars. ๐Ÿ™‚ Our elf reminded us to open the advent calendars this day (he’s leaning back and pointing to the calendars, and not sleeping like DH thought! ;)).

I am using vellum numbers by Crate Paper to mark the days this year.ย I layered a punched snowflake and gold numbers to identify our advent calendars.

In the second spread I have four days (part of day 1 and days 2, 3, and 4).

ย 

Here are the details.

I am starting to freak out because Christmas is less than a week away and I have done close to zero holiday related events.. I have just been too busy with work, but it sucks because this is my favorite time of the year and I wish I could savor it more.

Hello December!

I am excited to share my page for the December gallery at write.click.scrapbook! This month’s theme was holiday traditions, so of course I had to scrap our favorite one. ๐Ÿ™‚

I had lots of fun stamping and embossing on this page! Here are a few details.

Red glitter Zingย embossing powderย is a must for Christmas pages! ๐Ÿ™‚ย I also bought theย greenย one but haven’t used it yet.
Theseย Christmas Blueprints stampsย by Tim Holtz are from last year, but I just bought them and I am in love! The Santa is fromย this stamp setย and it’s just too cute! I bought these stamps with December Daily and Christmas cards in mind. I am glad I got them!
Another purchase I made with Christmas in mind was Ranger Archival Ink inย emerald greenย andย vermillion. I love how smooth the stamped images turned out!
Hope you had a great start to the month!

Hello, November

The theme for the November gallery at write.click.scrapbook is Dreaming. I let myself embrace the Christmas spirit and made this page, Dreaming of a White Christmas.

But rather than just a white Christmas – even though I firmly believe that snow must be had at Christmas!! – I am dreaming of spending the holidays with my family. It’s not going to happen – yet again – this year, and it makes me sad..

Here are a few detail shots.

I added some watercolors behind the white alpha to make it stand out. ๐Ÿ™‚
Amy wrote a great post that was inspired by this page. What are you dreaming of for Christmas?

Hello September!

Have you checked out the September gallery at write.click.scrapbook? This month’s theme is “palette-able”: we had to come up with a palette for our pages. I was super intimidated at the assignment, but then I just started playing, and I ended up having lots of fun! And I love how my page turned out! ๐Ÿ™‚

I decided to get the palette from my photo – green + orange, then I broke out the watercolors (these and these) and added pink and blue and silver to the mix. Here are some details:


I had so much fun coloring the Heidi Swapp alphas with watercolors!


Do you usually think of the palette for your page ahead of time, or do you just go with the flow? What are your favorite colors to scrap with? I love bright colors, and I think all my pages have some pops of color in them, I cannot help myself from adding color! ๐Ÿ™‚

Crate Paper Love

Hi there! NSD is coming up (I do have some work to do this weekend, but I hope to squeeze in some crafty time too!), but I have a page to share in the meantime. I made this for a color challenge on the Crate Paper blog. I love how it turned out!

I used the Maggie Holmes collection that I LOVE so much (the background paper, wooden clothespin, bow and the fabulous gold glitter Thickers!), plus the light blue paper from the 6×6 paper pad of the Fourteen collection. I added some sequins and wood veneer by Studio Calico, and a vintage Studio Calico bird stamp embossed in aqua Zing, a doily and some glitter tape by American Crafts. I recently bought some gold thread for my sewing machine, and I am in love! ๐Ÿ˜‰ Here are some details:

Sweet


Sweet


Sweet


Sweet


Sweet


Sweet

I added a brad to attach a tag below the layered photo+picture, and the tag pulls out..

Sweet

I added my journaling on the tag using my typewriter.

Sweet

I hope you liked this project!

December Daily – Days 2-7

As promised, I am back to share some December Daily pages. I had started out this project thinking I would be combining my Project Life and December Daily albums in one, but the truth is I love Christmas so much that it deserves its own album! ๐Ÿ™‚ So I’m doing a true Dec. Daily album, and I’ll catch up (or not.. ;)) on the ordinary events in my PL album. ๐Ÿ™‚ I have been super busy with my last classes and exams, on top of my regular work, so I’m a bit behind, but I am keeping things simple in this album, so I will be catching up soon. Here are days 2-7!

DD 2012 - Day 2

I splurged and bought Kelly Purkey’s December Daily kit – I fell in love with the stamp, and I just couldn’t resist – and I’m so glad I did! For this spread I just used a journaling card from the kit and the stamp for the date. The rest is all photos – I loved them all and wanted to include them. My two favorite people in the whole world!

DD 2012 - Day 2

I thought the confetti journaling card went perfectly with all the Christmas lights/bokeh pictures. ๐Ÿ˜‰

DD 2012 - Days 3-5

I included as an insert a prank from our elf.. ๐Ÿ˜‰ DH was printing out 200 copies of the program for a concert that would take place on Dec. 16th, and our elf decided to steal the show and printed his own version! ๐Ÿ™‚

DD 2012 - Days 3-5 

Gotta have glitter in my album! ๐Ÿ™‚ The label is from the Studio Calico 25 Days class (Dec. Daily class) kit; the background paper is by Basic Grey Fact&Fiction, I covered a Studio Calico Wonderland wood veneer tree with Stickles, and layered it on top of some awesome glitter tape. Oh and the date stamp? I recently bought this awesome number stamp and I’m in love!

DD 2012 - Days 6-7

You will start seeing a pattern here.. when I don’t have any Christmas pictures for the day, all you get is an Elf picture. ๐Ÿ™‚ So I can also combine multiple days in one page and keep the thickness of the album reasonable. I journaled and stamped on the back of the program (stamps by Ali Edwards, Cute and So Totally Happy sets). On the right, filler cards are made with A Christmas Tradition by Jenn Barrette and Valorie Wibbens.

DD 2012 - Days 6-7

For this spread, I added in a paper bag from Starbucks – I love their designs so much, plus you never go wrong with bunnies! <3 a="a" href="http://scrapflower.com/shoppe/product.php?productid=21109" i="i" left="left" on="on" target="_blank" the="the" used="used">journaling card by creashens
 (slightly recolored), and the bottom two pockets are made using A Very Vintage Christmas by Digital Design Essentials.

DD 2012 - Days 6-7

I had so much fun decorating the back of the paper bag!

DD 2012 - Days 6-7

In all honesty, I botched the first stamping: I stamped “Hey Santa!” (from KP’s DD kit) in red but I didn’t press it down properly so the middle remained blank, so I decided to color the whole bubble red and stamp another sentiment on top of it instead (oh what fun, from the 25 Days class kit). I chose green because it matched the Starbucks logo, and I restamped the Hey Santa in green too (properly this time). ๐Ÿ˜‰ I love the result!!

DD 2012 - Days 6-7

I love this page too – I decided to use a journaling card I’d pre-made using Jenn Barrette’s A Month of Memories and I only just realized that it matched the picture on top of it perfectly, with the peppermint sticks! I made the title using Dear Lizzy tile stickers (the package comes with 2 sheets, one with gold letters on white and the other with white stickers on gold) and Dear Lizzy Fox glitter thickers.

That’s all I have for now, hoping to get caught up very soon!

Putting up the Tree – Paper LO

In the past few months, after falling in love with paper and stamps while working on my Project Life, I have ventured into paper scrapbooking, and I am hooked! I haven’t blogged any of my pages so far, but that is about to change. ๐Ÿ™‚ Today I want to walk you through a page I made while my mom was visiting – it was a super quick page, and I had fun putting it together.

Putting up the TreePutting up the Tree


Inspiration
The inspiration for this page came from a roll of pretty trims I bought with my mom.

Putting up the Tree

Isn’t it super festive?? I matched it with pictures of my mom and me putting up the tree. ๐Ÿ™‚

Colors and cutouts
Unfortunately my mom wasn’t wearing Christmas colors in the picture ๐Ÿ™‚ but I went with it anyway and I ended up liking the blue colors in the end. ๐Ÿ˜‰ I took a class on the Silhouette at Studio Calico last month, and I wanted to include some cut outs on my page. This was my first time using and cutting POW glitter paper by American Crafts – seriously, that stuff is amazing!! The only color I had on hand was this dark charcoal, so I decided to combine it with some touches of silver.

Layout design
Being born as a digital scrapbooker, I felt most comfortable mapping out this page on the computer to decide what size to print out my photos at and figure out how big my cut outs needed to be. I decided to use the negative of a cut for my title.

Cut outs
I cut out two words/phrases from POW paper with my Silhouette. The “joy” writing is from the Silhouette store, and I love how pretty the negative is too! I will definitely be using that in my December Daily album.

Putting up the Tree

Getting started
Once I printed out the photos, the first step was to choose my background paper and figure out where to stamp. I went with a white woodgrain paper because I already had plenty of color in my photos. I used some exclusive stamps from the 25 Days class at Studio Calico and another from Kelly Purkey’s Dec. Daily kit. I put the stamps on acrylic blocks and placed them on the page to get an idea of the layout. Before stamping I took a quick snapshot of the layout in case I forgot how everything was supposed to be put together after the stamping. ๐Ÿ™‚

Putting up the tree

Stamping+embossing
As I mentioned earlier, I decided to add some touches of silver, so I stamped my stamps with clear ink and embossed in silver. (my not-so-crafty mom watched the process in awe – she was really impressed at how cool embossing is ๐Ÿ˜‰ I will not mention that after I finished putting the final touches to this page she said “I don’t know where you find the patience for this, I’d have already thrown everything out!! :-))

Photobucket

While I was at it, I also embossed some Studio Calico wood veneer in silver – snowflakes and trees.

Putting up the Tree

I pressed the wood veneer down onto the clear ink pad, sparkled the embossing powder on top and then I used a pair of tweezers to hold on the little pieces while I turned on the heat gun. Some of the pieces didn’t get good coverage at the center, but I kind of like that look too – it reminds me of icicles!

Putting up the Tree

I decided not to emboss the large tree that goes with the title, because I loved the look of plain wood on top of the sparkly POW paper.

Putting up the Tree

Journaling
I didn’t want to risk botching the page with the journaling, so I went the safe route – I wrote onto vellum, then cut it into strips and moved them around to find the best placement. At this point I cut out some pieces of the pretty trim and placed them on my page as well (it took a while to get it to stay straight but I figured it out! ๐Ÿ™‚ I attached it to the back of the POW paper with washi tape). Then I adhered everything, and I attached the pieces of vellum using drops of glossy accents.

Putting up the Tree

Title
I debated whether to put in the words for “tree” or just leave the wood veneer, but in the end I did add a silver glitter alpha because I wanted to add some more silver touches.

Putting up the Tree

And that’s it! I hope you enjoyed this tutorial!

Supply list:
woodgrain paper by LCI paper
POW paper by American Crafts
Stamps by Studio Calico and Kelly Purkey
Wonderland wood veneer by Studio Calico: snowflakes and trees
vellum paper
ZING! silver embossing powder
American Crafts slick writer black
Amy Tangerine Scene Thickers
Silhouette SD cutting machine
Foam dots
Glossy Accents (Ranger)
Canon photo paper
Trim by Living home
Versamark clear ink
Embossing heat gun
Roller date stamp K&Company
Archival Jet black ink (Ranger)