Let’s Go

Ali Edwards has some digital journaling cards in her store to complement this month’s Story Kit. I love them!
So I made another page in 9×12 format. I have pretty much settled to make a travel album using my gold 9″x12″ album and I love how it’s turning out. A few of the pages I made so far are 12×12 so I may end up trimming them to fit in this album.

I chose a picture from each of the places we visited on our trip. I debated whether to go with color or black&white, but the b&w won in the end.

I added the name of the place on the photo, and a number sticker to put them in chronological order.

I stuck to black, white, red, and some pops of aqua for the page.

This page will likely go to the end of my album. I love it!!

Go See the World

This month’s Story Kit theme at Ali Edwards’ is GO: perfect to keep documenting my month-long travels from this past April. I decided to scrap a picture we snapped from the plane.

We couldn’t have asked for a better start for our trip! The view was spectacular!

I left the photo big (8.5″x11″ on a 9″x12″ background), and embellished the top and bottom with bits and pieces from the digital kit.

I love how it turned out!

Love Being Here

Today I have a page to share with you.. a page that came together in maybe 15 minutes or less. The starting point were these brushes by Ali Edwards.

With a large photo and the brushes, it was so easy to finish off the page with a few embellishments and stamps.

I love mixing digital brushes, stamps and embellishments!

Have a nice week!

Trip of a Lifetime

I am so excited to share what I created with this month’s Memory Pockets Monthly at The Lilypad! First off, I made a page with the main kit and papers by Sara Gleason.

Credits:
Memory Pockets Monthly: Viewpoint by The Lilypad
Arboretum: Viewpoint and Viewpoint Papers by Sara Gleason
Viewpoint Element by Sahlin Studio

Then, my jaw just about dropped to the floor when I saw the add ons by Sahlin Studio:


These products were absolutely perfect for me to scrap a recap page about my month-long April travels. I scrapped these pages in 9″x12″ size (a first!). I love the right page with the 3×4 cards. I had to matte my 8.x”x11″ hybrid map onto a larger piece of paper, and I selected this pretty vellum from my stash, since it matched the colors perfectly.

Credits:

This page is hybrid (=I printed out the digital designs by Sahlin Studio on Canon matte photo paper 8.5×11 and 4×6). Then I added more details.. washi tape, stitching, and of course stamping.

I chose one or two photos from each of the countries we visited.

I also made a fun recap of the main statistics of the trip. I couldn’t fit more, but I love this summary.

I added numbers to the map for the countries we visited, and listed them on a journaling card.

More stamping on journaling cards..

I made the title combining three pretty alpha stamps. It truly was the trip of a lifetime!

I’m so happy with how this spread turned out!

An Awesome Story

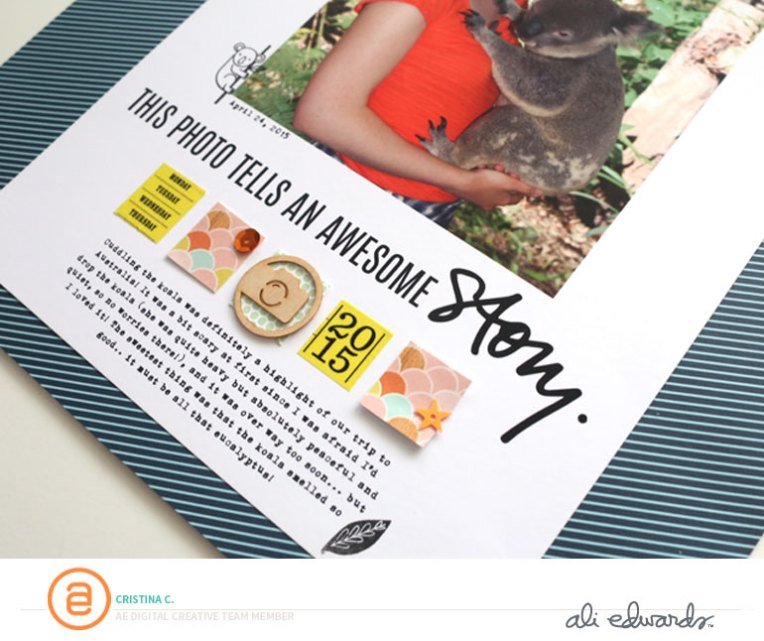
And after the pandas.. my second page from my vacation features a koala! 🙂 Straight from Australia.

It was seriously the cutest!! This is a hybrid page. I printed out the picture, word art by Ali Edwards and journaling, then added it on top of the background paper, and embellished with some paper and washi, plus a couple of physical stamps.

I love how Ali’s products encourage me to get those stories told! It would have been easy to make a page with this awesome photo and no words, but I wanted to document more than just the cuteness.

Hybrid Page

I am reposting a quick hybrid tutorial I made for the write.click.scrapbook blog.

I ventured into scrapbooking from the digital side and, while I still do all-digital pages, now I also love incorporating digital designs in my paper pages. Digital designs are so easy to use. They can be as simple as adding an overlay on top of your photos, or they can be used to jumpstart the page’s design, like in the example I will show today. What I really like about it is that I can plan my page on the computer before committing to paper.

The start: on the computer
For this page, I used a set of digital brushes by Ali Edwards called Who What Where Why Boxes. I was inspired by this set of brushes to make a page about me, so I selected four boxes that would help me tell the story. I laid them out on my canvas in Photoshop, and picked four photos to go along with them. I also changed the color of the boxes. I laid everything out in a nice grid design.

This could very well be a digital page as is, and could be completed by adding some simple journaling. Instead, I decided to turn it into a hybrid page — this means that I printed out the digital elements and my photos, and combined them with some papers and embellishments from my stash.

Print
I print everything at home – it’s so much easier for me to be able to go from computer to paper in one click and a few seconds. I recently got a new printer and I like the quality of the prints. For this page, I wanted to add some texture, so I decided to print the digital brushes on vellum paper. I printed the photos on photo paper.

Match with other supplies
Next, I picked a neutral background paper from my stash (by Basic Grey). I also used some letter stickers (Simple Stories) to add a few words under each box. I used colored brads to attach the vellum boxes to my page.

I stitched down the letter stickers with my sewing machine. At first, when I laid out my page on the computer, I was planning to make an 8.5″x11″ page. But then, after placing the photos and boxes on the background, I liked the white space on the side, and decided to keep it and add a stamped title.

And there you have it!

I love the texture that these boxes add to my page with the see-through effect.

And now.. I’d love to hear from you! Do you incorporate digital designs in your pages? Leave me a comment and let me know!

I Need A Vacation

Truth…

I tried something new this week. I combined the gorgeous Enough brushes by Ali Edwards and the Holiday Hangover digital kit by Allison Pennington (50% off today!!!) to make a 6″x8″ page. I added some stamping in black ink and some embellishments to finish off the page.
I have fun experimenting with this size! And it was a very therapeutic page to make. 🙂

Yeah so my new printer is all installed and ready to go. I like it. Still need to figure out the right setting for 4″x6″ borderless printing though as it’s just a tiny bit off.

New Printer!

Hello and happy weekend! I have a busy weekend ahead, with lots of work I need to get done, and some play – I got myself a new printer! 🙂 But first, I want to share with you a couple of pages I made with some awesome new releases.

First up, a collection by Mari Koegelenberg that is super trendy, with the planner craze that has taken over the scrapbooking world!
I have not quite jumped in on the planner wave myself, but I have to say that laying out the month like this really inspired me. Who knows.. I may give this a go!

Next up, a bright, happy kit and journaling cards by Sahlin Studio:

I used this to make a hybrid page. I did this before my new printer arrived so I had to be creative using colors that my old printer would print (yellow was safe ;)).

And here are a couple close looks:

Have a great weekend!

Hello Twenty Fifteen

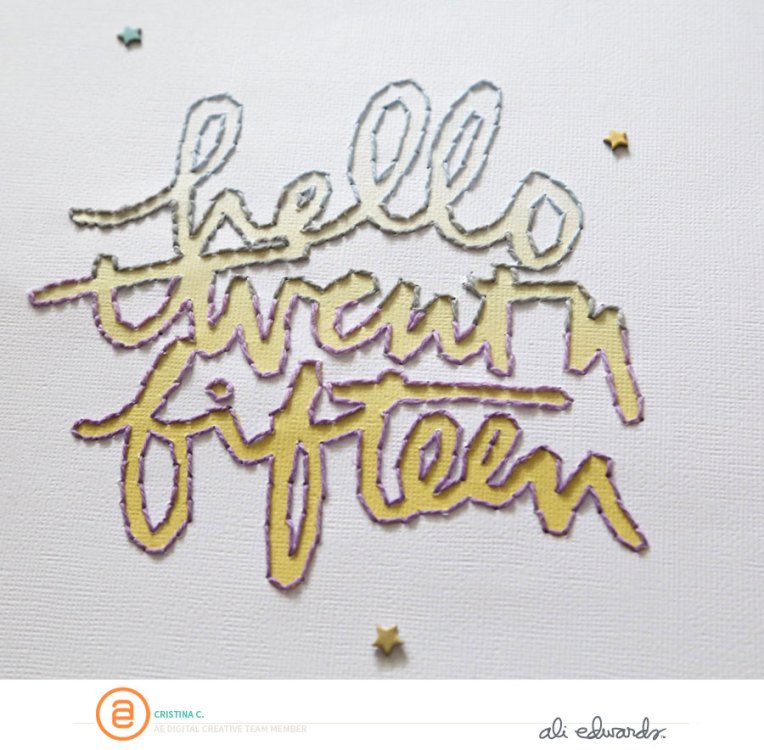
Yeah, I guess I am on a roll with pages welcoming the new year. 🙂 But when I saw these new brushes by Ali Edwards, I couldn’t resist!

I knew I wanted to use one of the brushes in a bold way. So I added a gradient color overlay, and printed it out on white card stock. Then I spent a loooong time stitching around it with four different thread colors. [why do I always underestimate how long it takes to hand stitch something?? LOL.. But it was totally worth it! ;)] I thought about adding some small photos + journaling + embellishments around the word art, but then I decided to make this a 2-page layout instead.

I just added some stamping, a journaling card and a photo on the second page, and scattered a few stars throughout.

I love how this turned out!

First hybrid/paper page of 2015: done! 🙂